Creating Dynamic Hair#
Note
This tutorial is an extension to the wearables documentation. Please refer to the Wearables documentation to fill any gaps in the general workflow. This tutorial will only describe the work needed for simulated hair that diverges from the original documentation. You may not need details outlined here for static hair.
Before following this tutorial familiarise yourself with the Wearables documentation. For simulated hair, the workflow differs to section 7. Import Into HELIX Studio. This documentation is a supplement to section 7. Here, more asset creation detail pertaining to hair bone setup is given along with describing the import process and setting up the Physics Asset.
1. Set Up Bones#
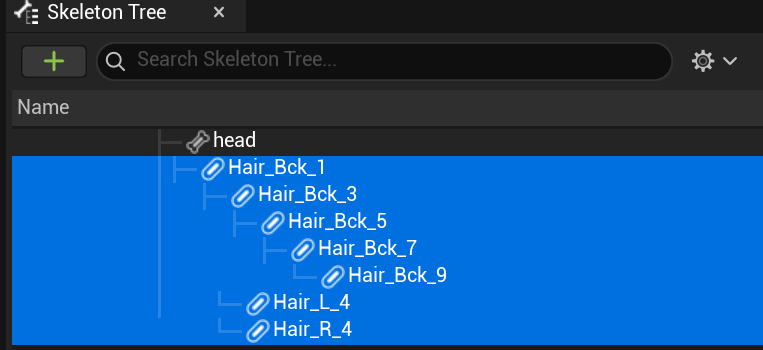
First, you need to create new bones for long pieces of hair e.g. ponytail. For this example we’ve created the new hair bones stemming from the Head bone:
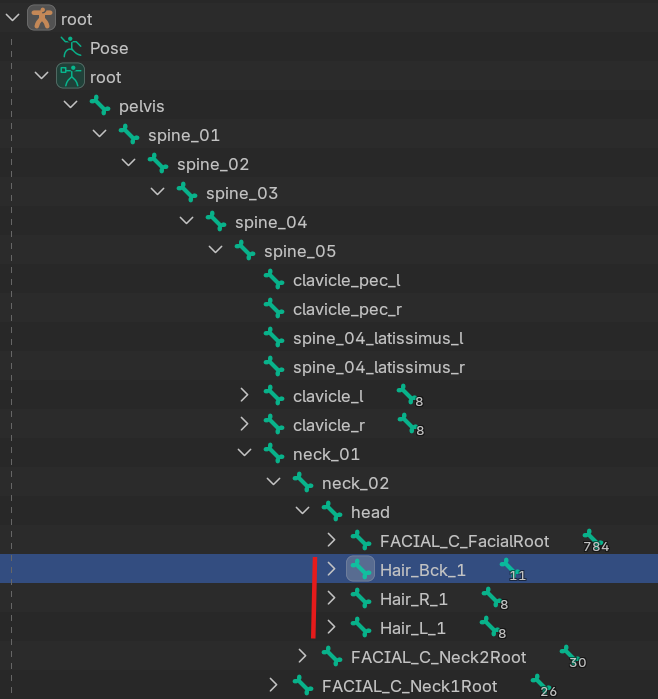
In this example there’s 3 long bits of hair we want control over, so we’ve created 3 bone groups. An example of the main back hair piece can be seen in the image below.
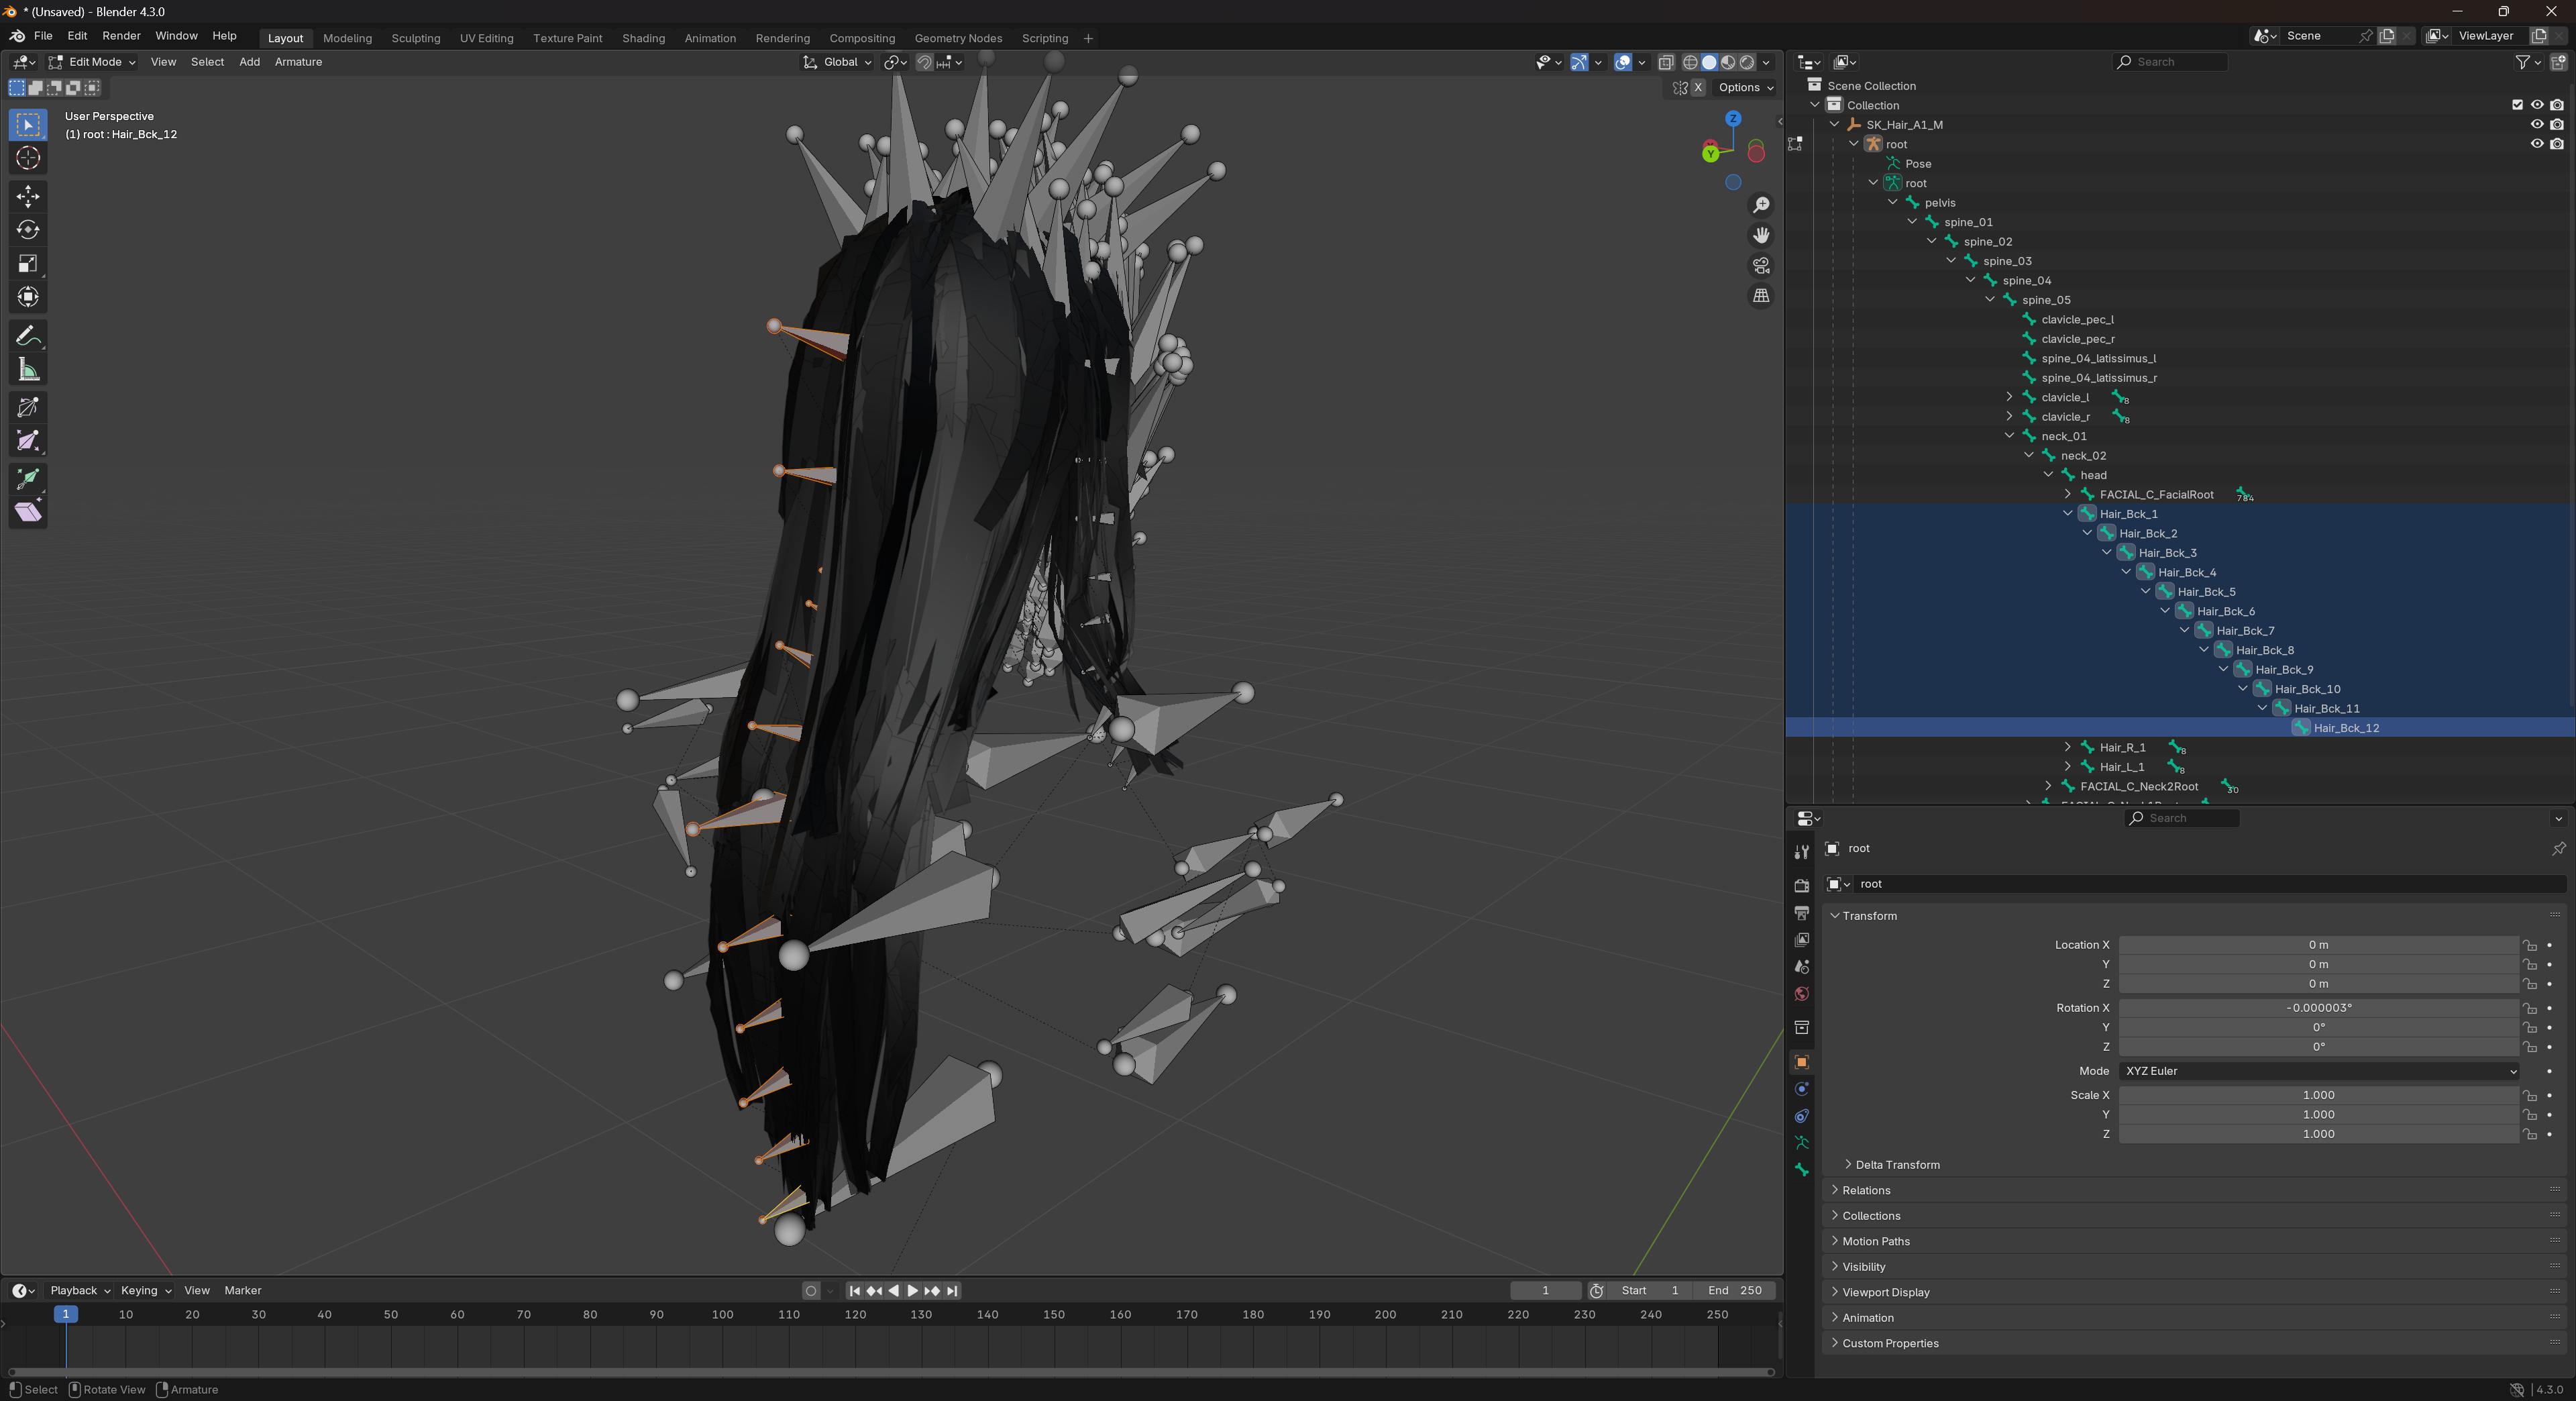
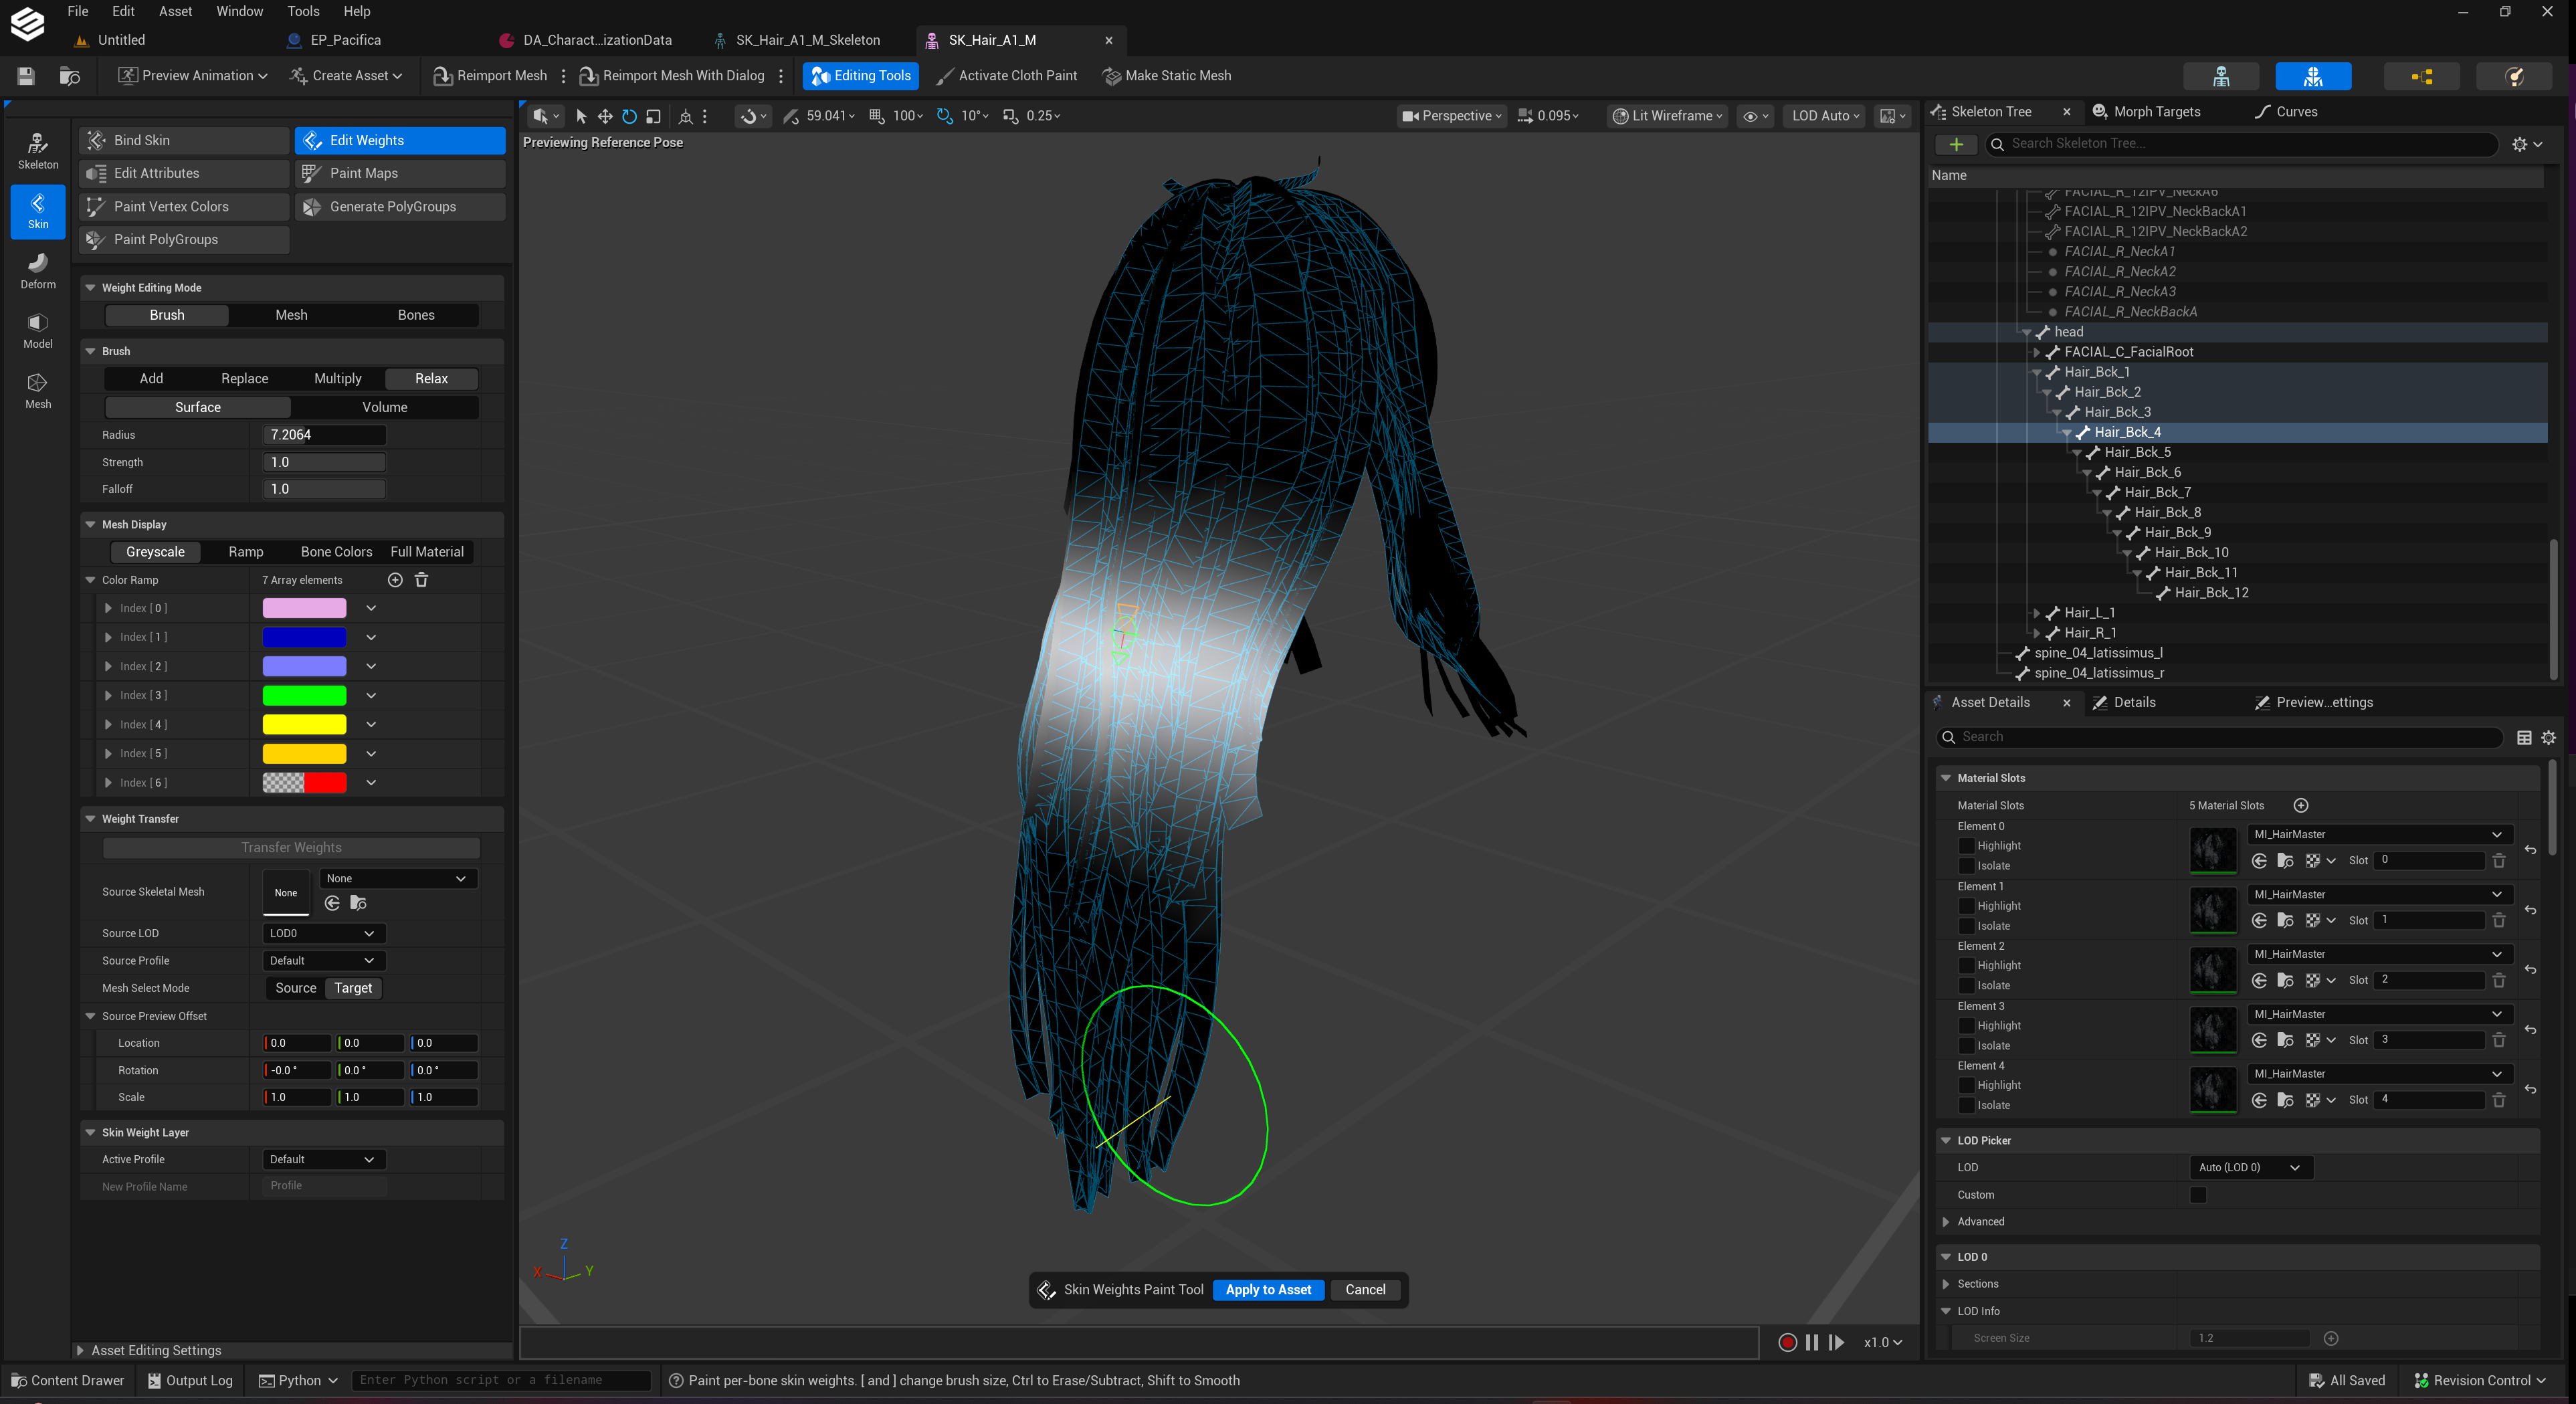
After parenting you hair and the bones take some time to paint smooth, accurate weights around the bone. Highlighting the areas of influence. Make sure the weights don't intrude onto other parts of the hair mesh that shouldn’t move or you will get stretching.
2. Export Your Hair#
Export your model exactly how it’s shown in the wearables documentation. Making sure you’re hierarchy, LodGroups and bone binding is all setup.
3. Import Into HELIX Studio#
Import your .fbx file into the correct folder as outlined in the wearables documentation - except this time do not assign a skeleton. Leave it blank because we will need to import our new skeleton as we made bone changes / added bones.
4. Set Up Physics Asset#
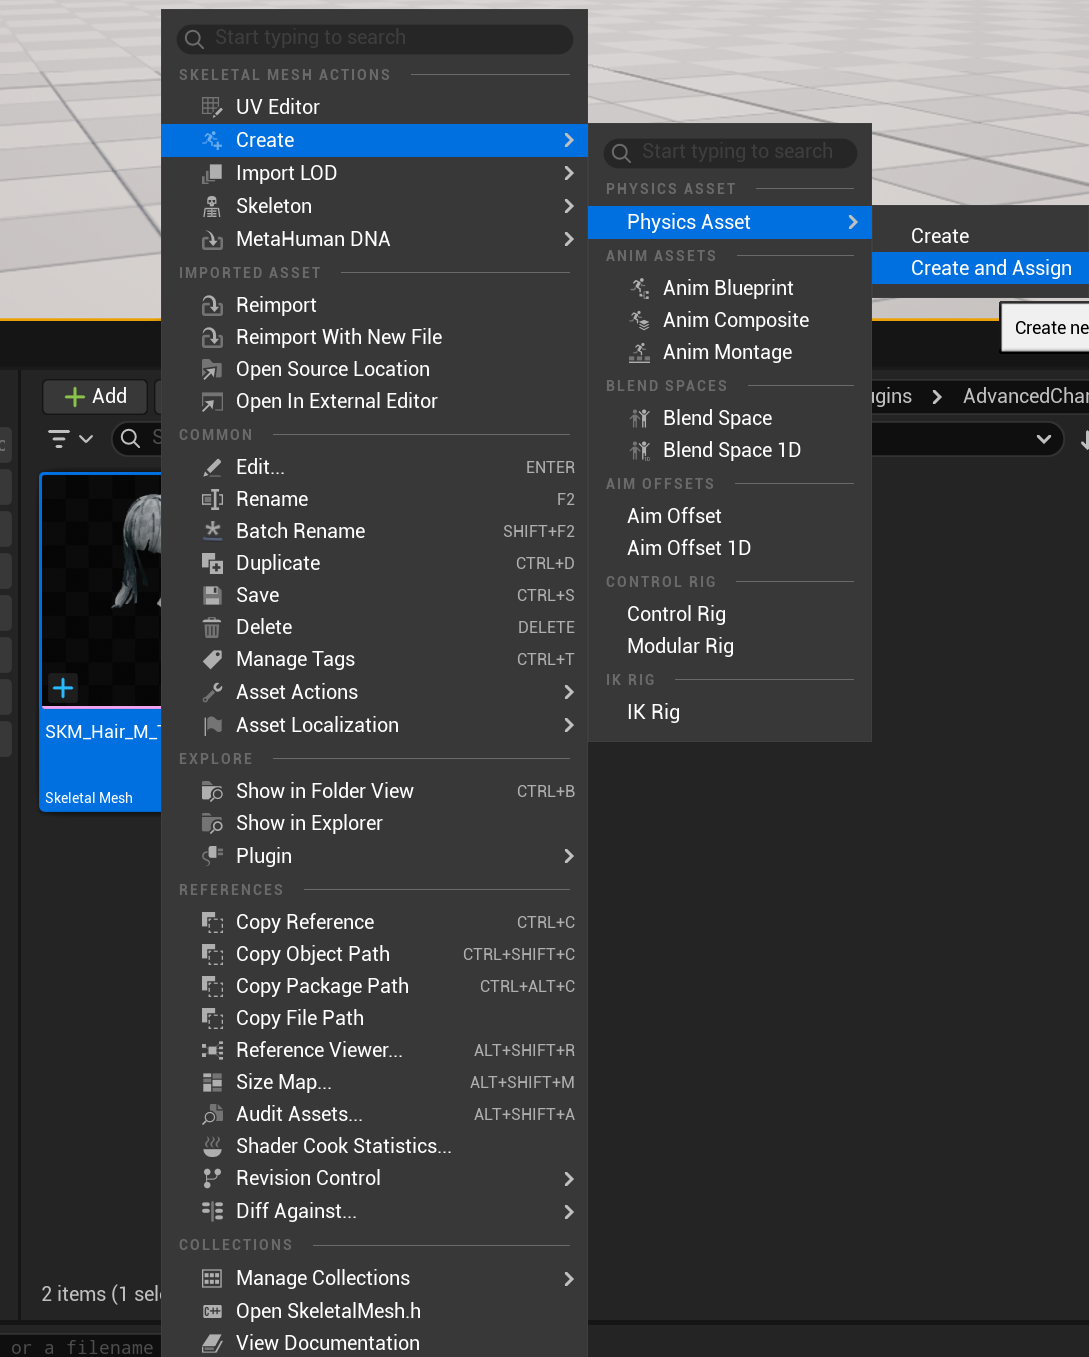
Right click the imported hair Skeletal Mesh, navigate to Create > Physics Asset > Create and Assign.
In the popup window, set Auto orient bones OFF.
Then hit Create Asset.

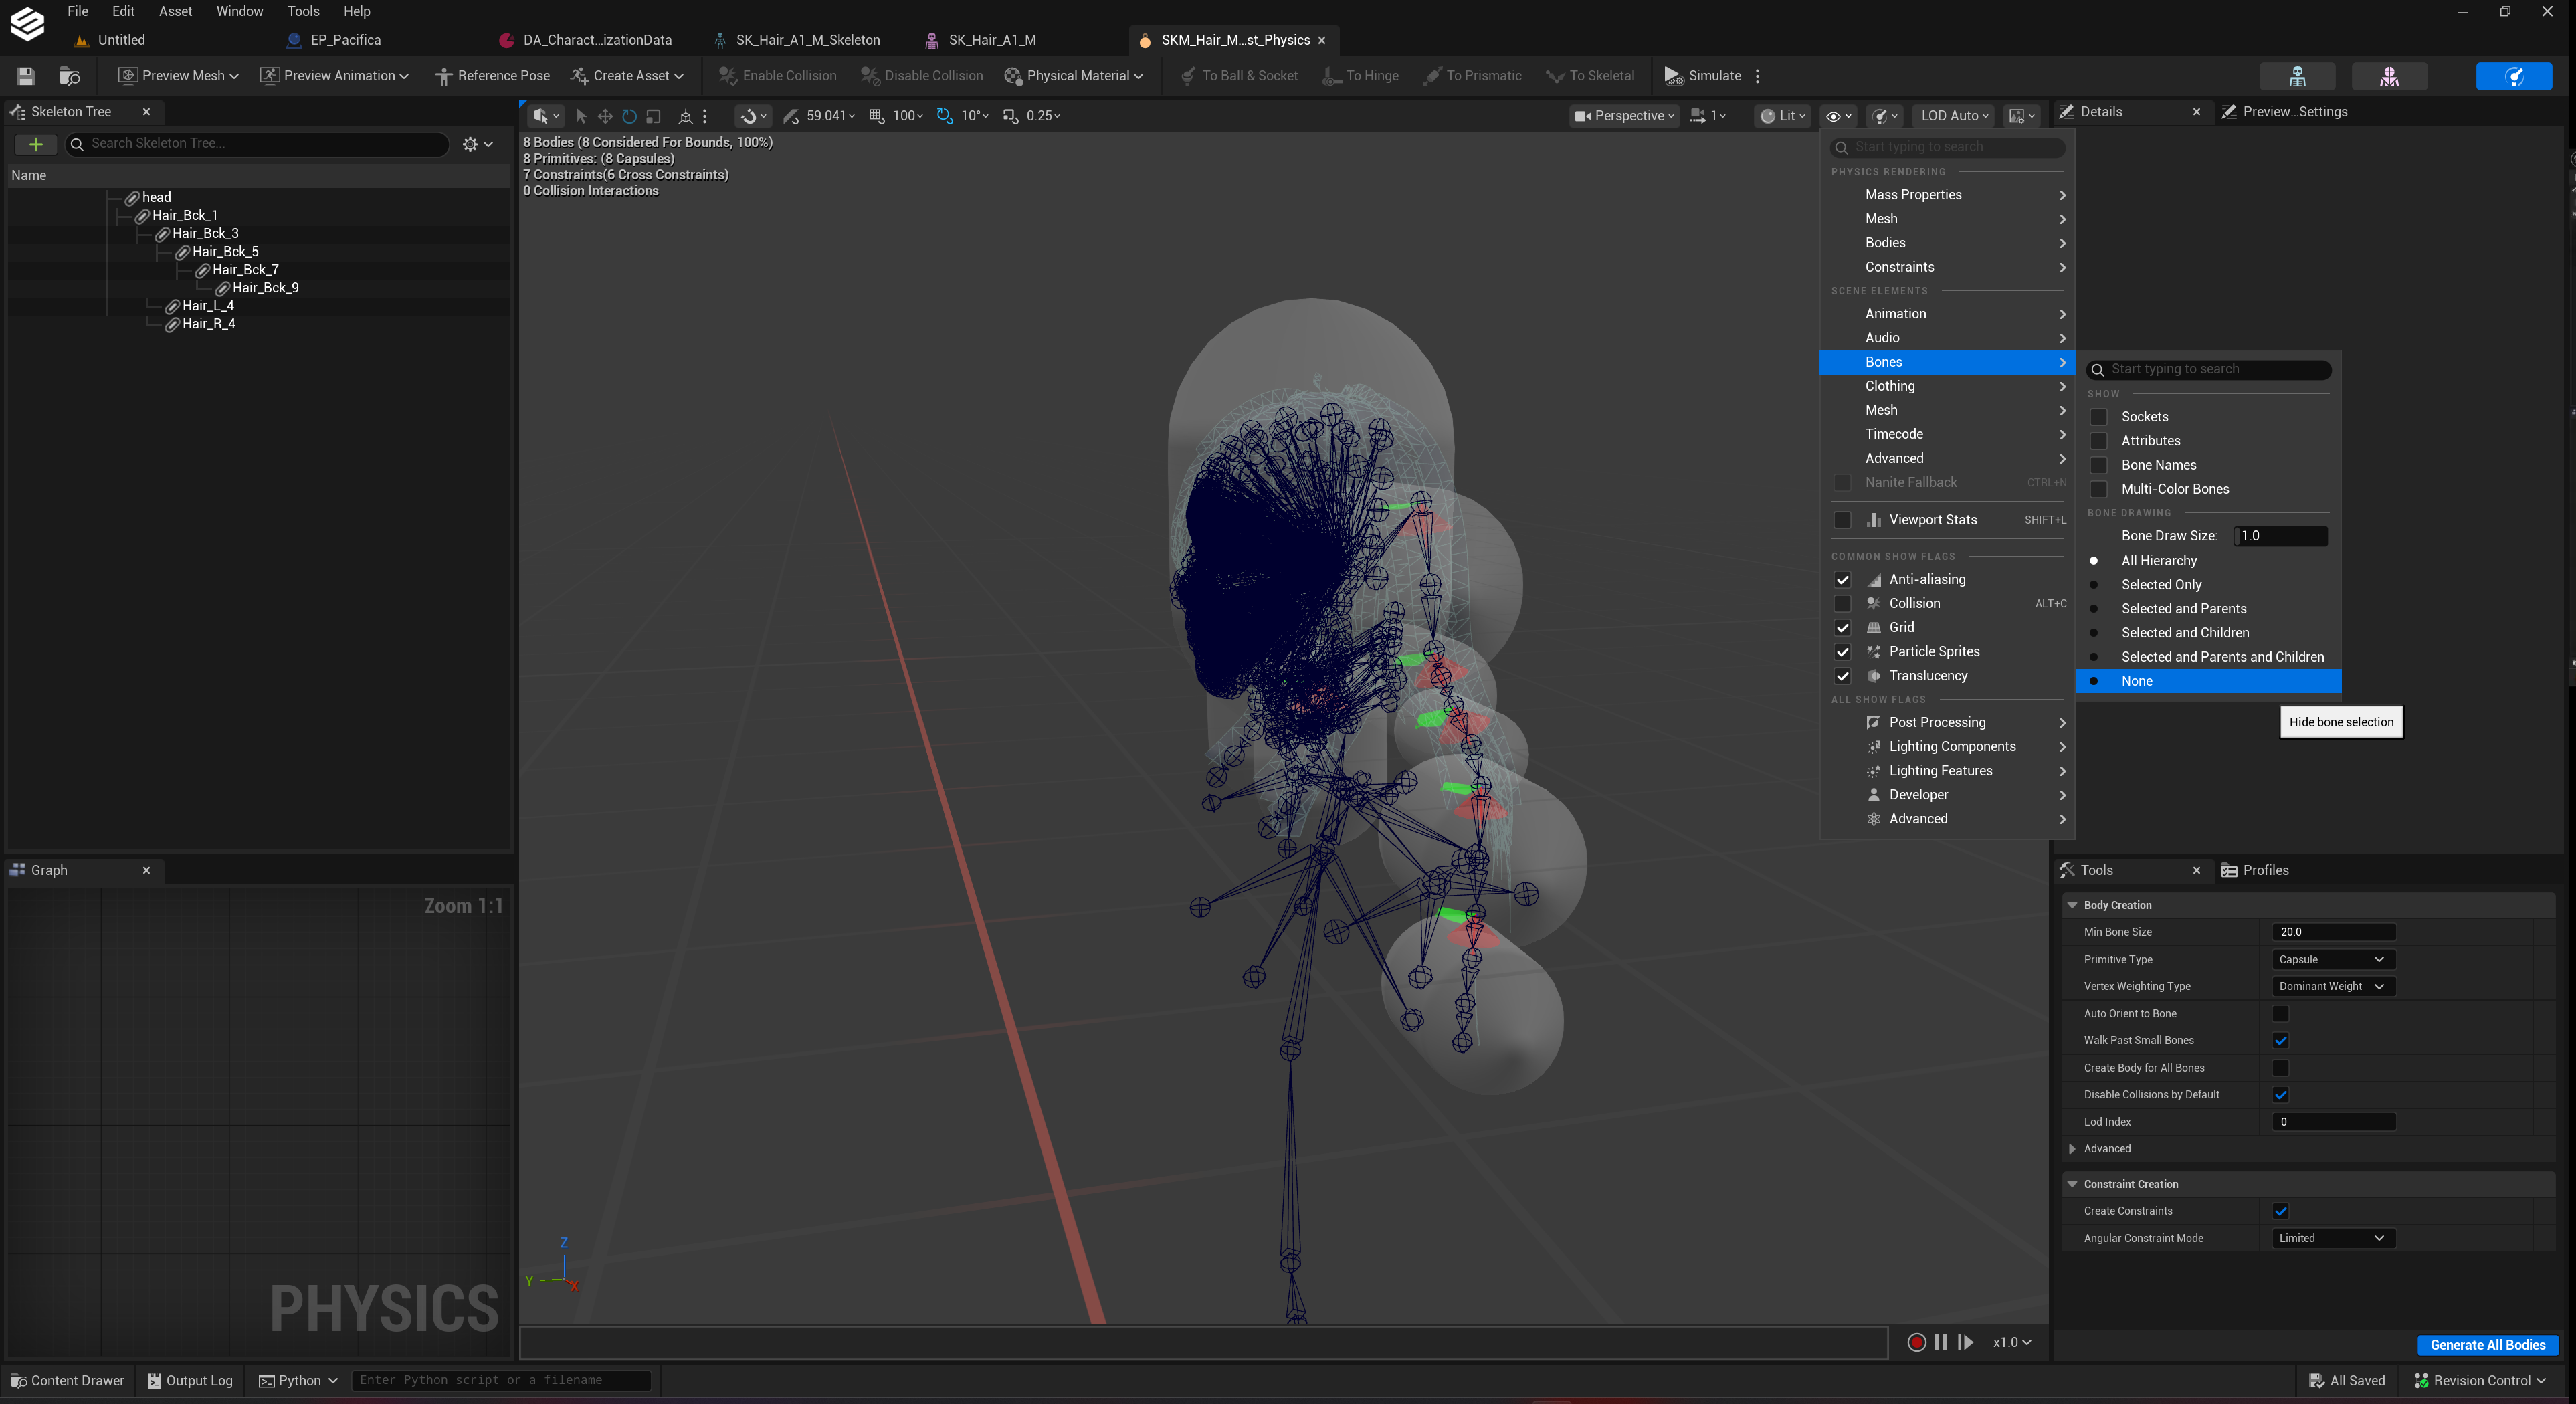
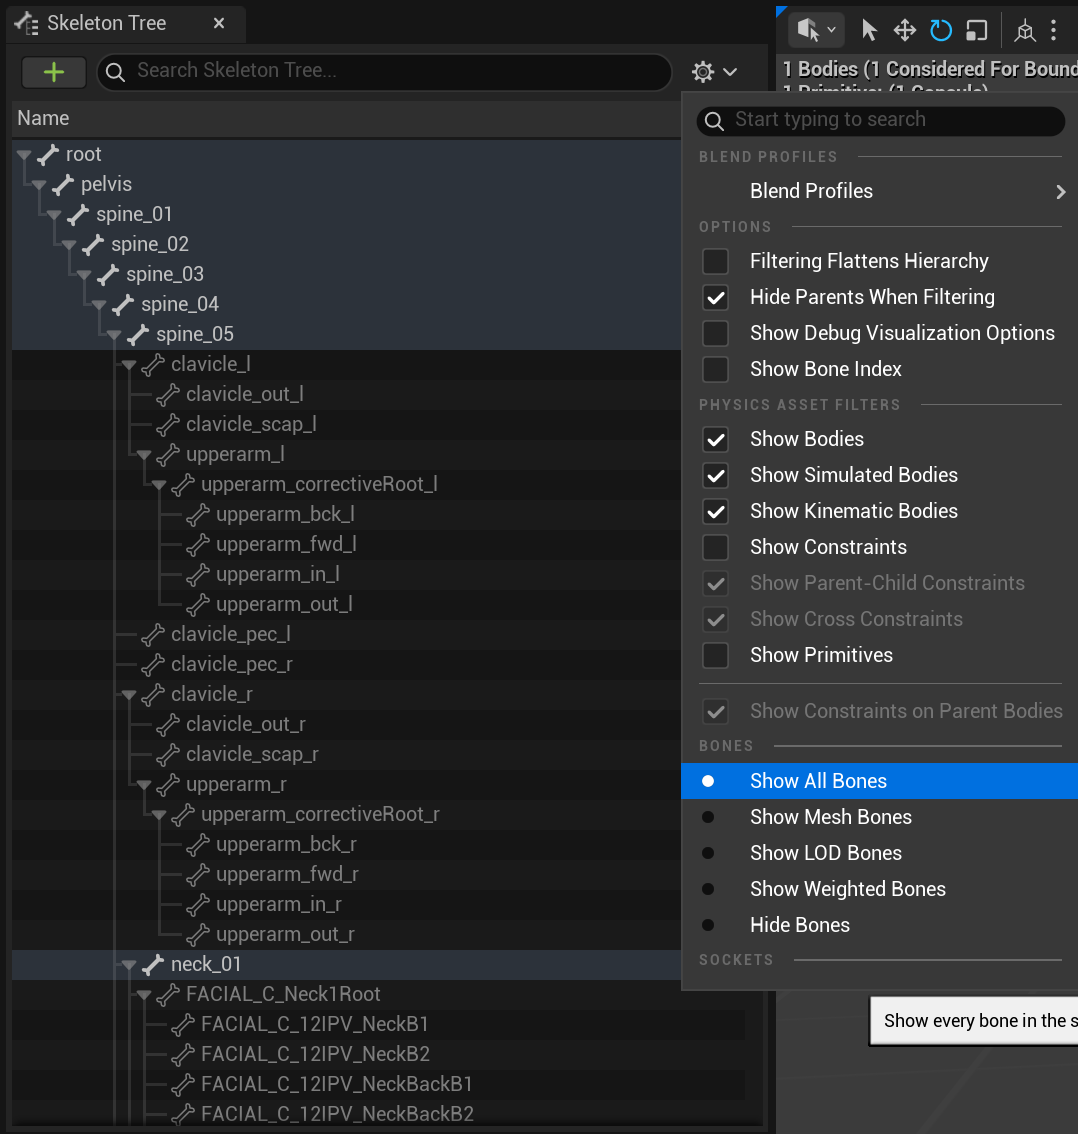
In the Physics Asset editor, you can press the "eye" icon and navigate to Bones > None / All Hierarchy to toggle visibility of the skeleton bones in the viewport. It can be helpful to have them set to None.
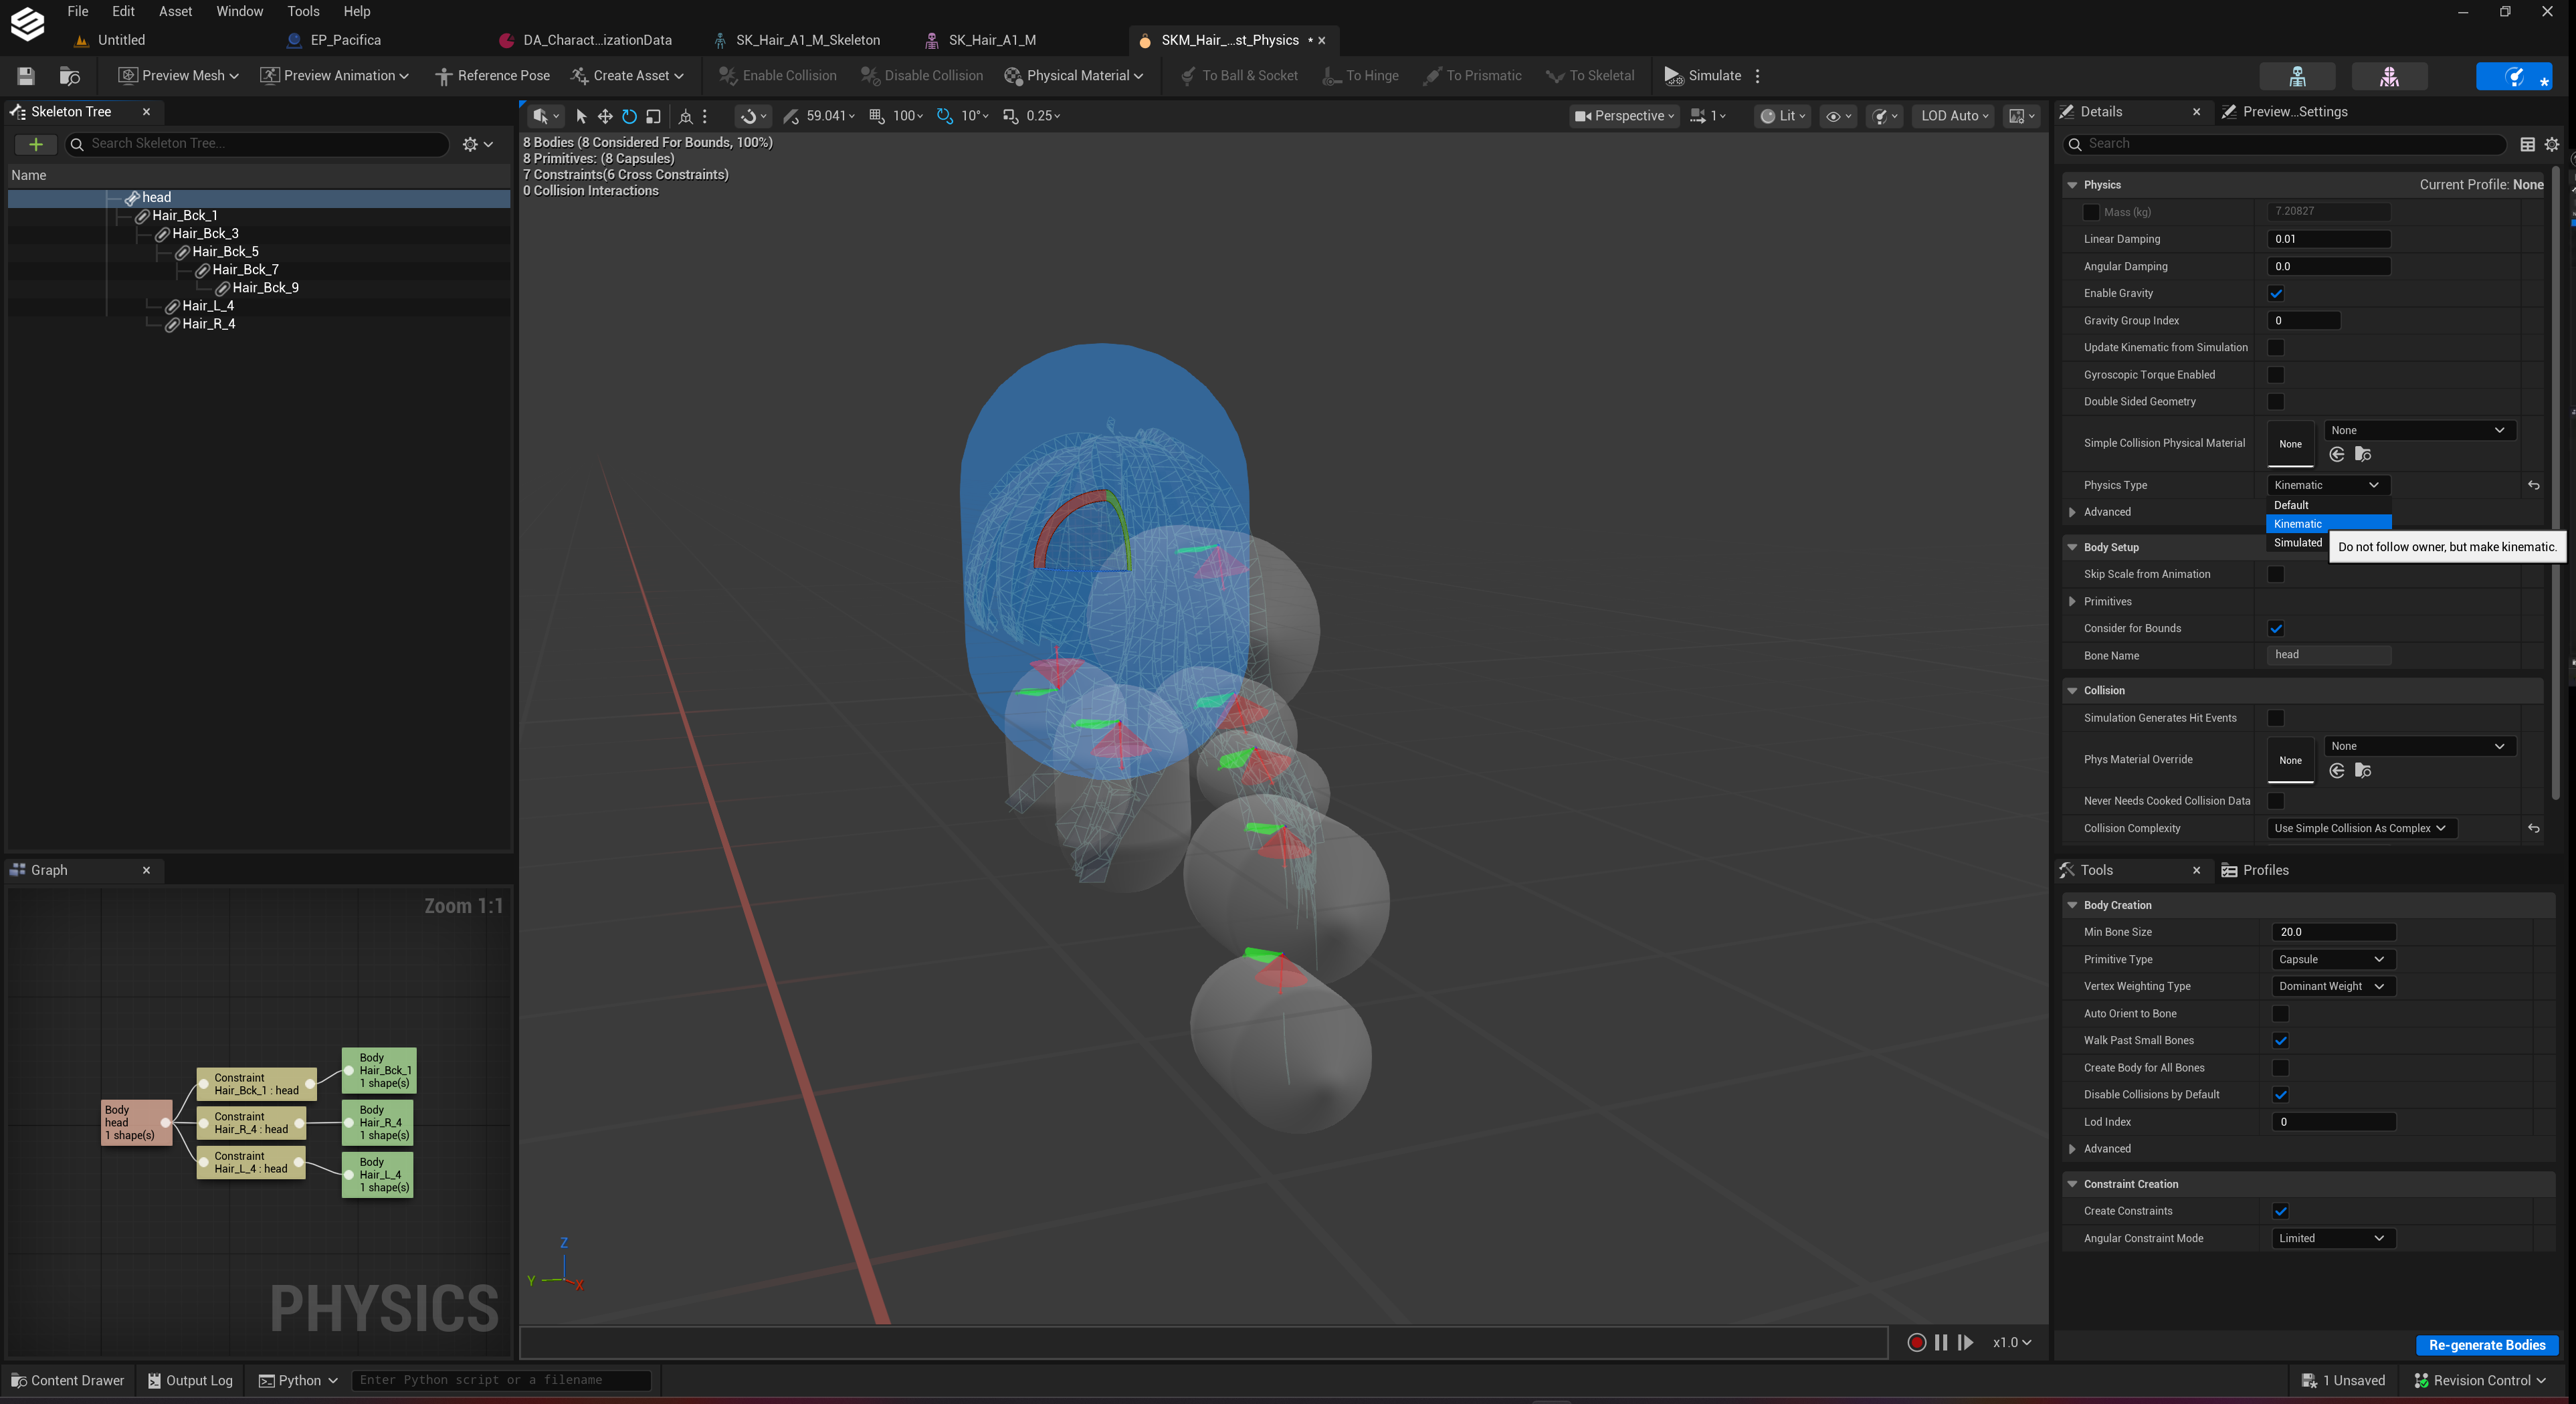
Next, select the Head capsule and in the Details panel navigate to Physics Type and set it to Kinematic to stop the whole head mesh dropping to the ground.
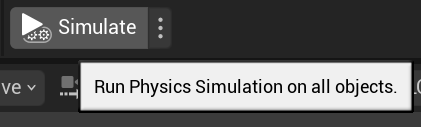
Press Simulate to see the simulation (remember to stop simulating by pressing it again when you are done).
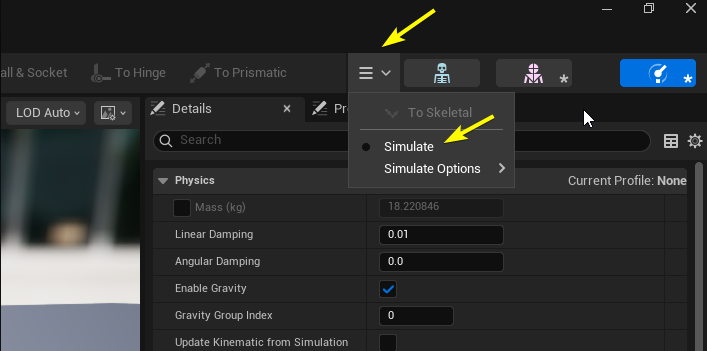
If you can't see Simulate button it may be hidding in this burger menu:
In the Skeleton Tree, delete all physics shapes other than head so we can start fresh.
Next, in the same window, press the "cog" icon and navigate to Show All Bones.
Select the following bones: root, spine_03, spine_04, spine_05, then right click and navigate to Create Bodies / Constraints > Create bodies with Capsules.
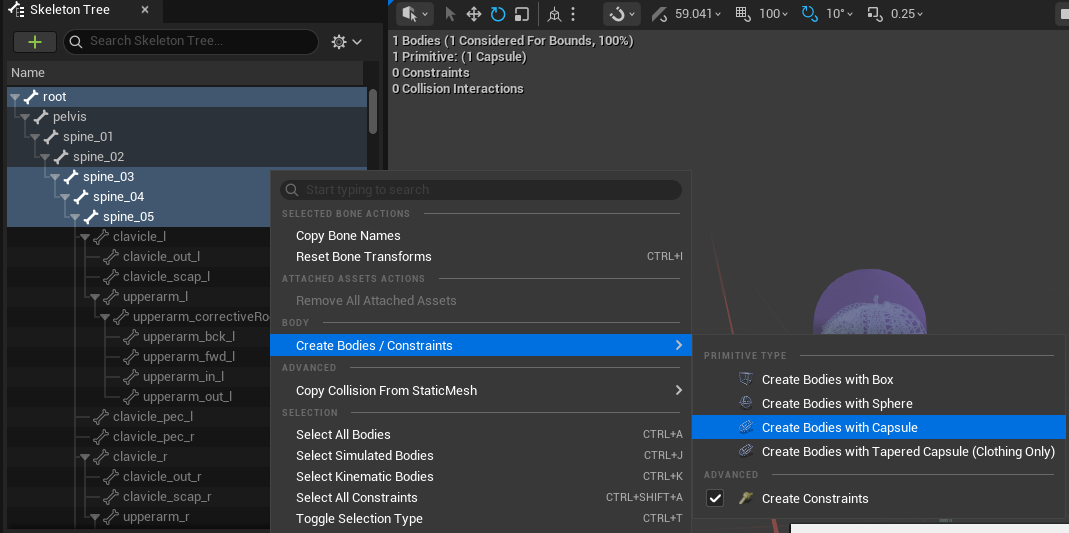
This will add capsule bodies at those bone locations:
To make things easier, hide the bones in the Skeleton Tree again by pressing the "cog" icon and navigating to Hide Bones.
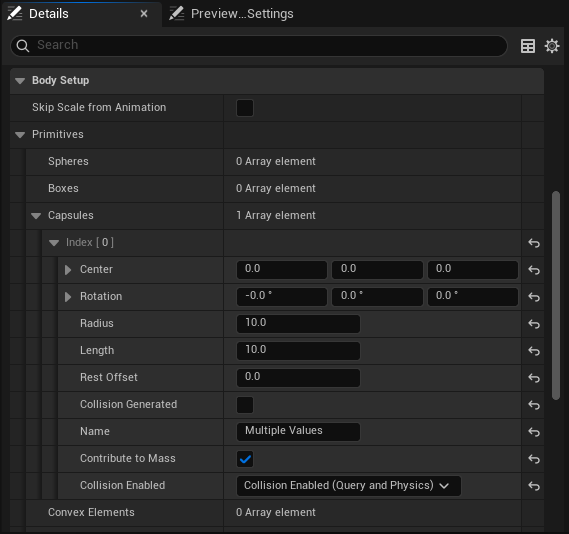
With all the new capsules selected, in the Details panel under Body Setup > Primitives > Capsules set Length and Radius to 10.
Next, set the Physics Type to Kinematic. After that, select Show All Bones again in the Skeleton Tree.
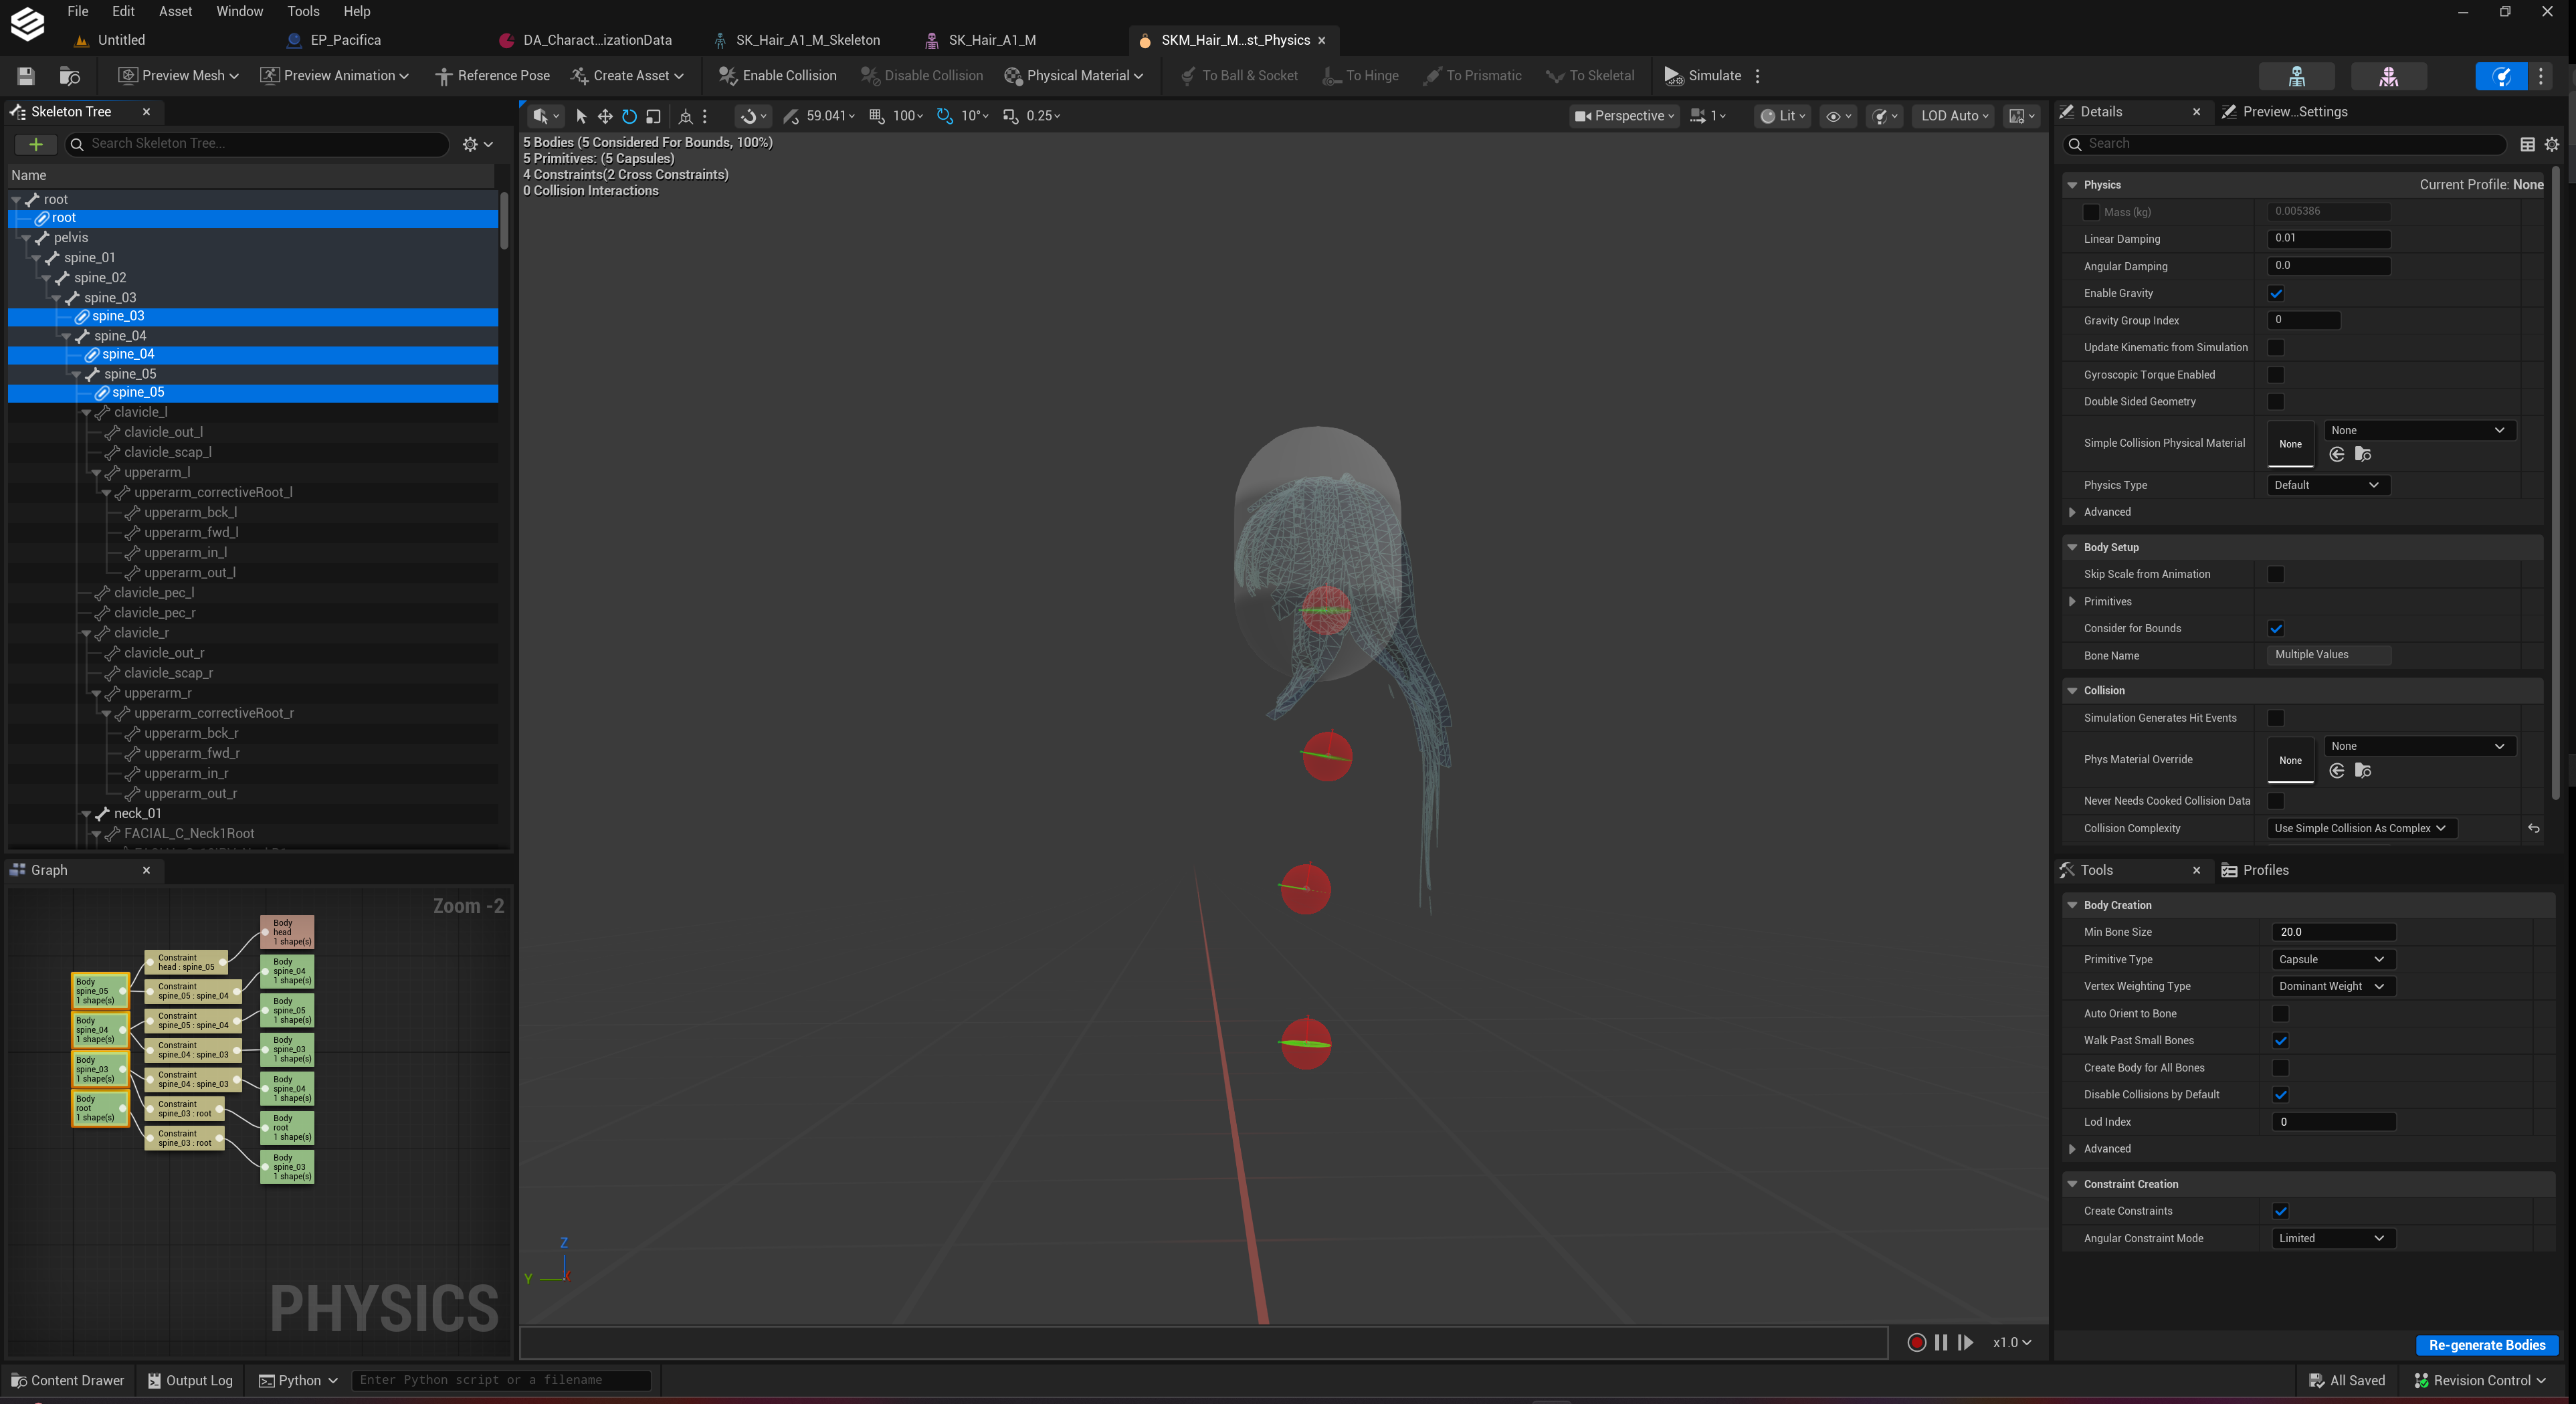
With all bones now visible, scroll down to your created hair bones. Select them all:
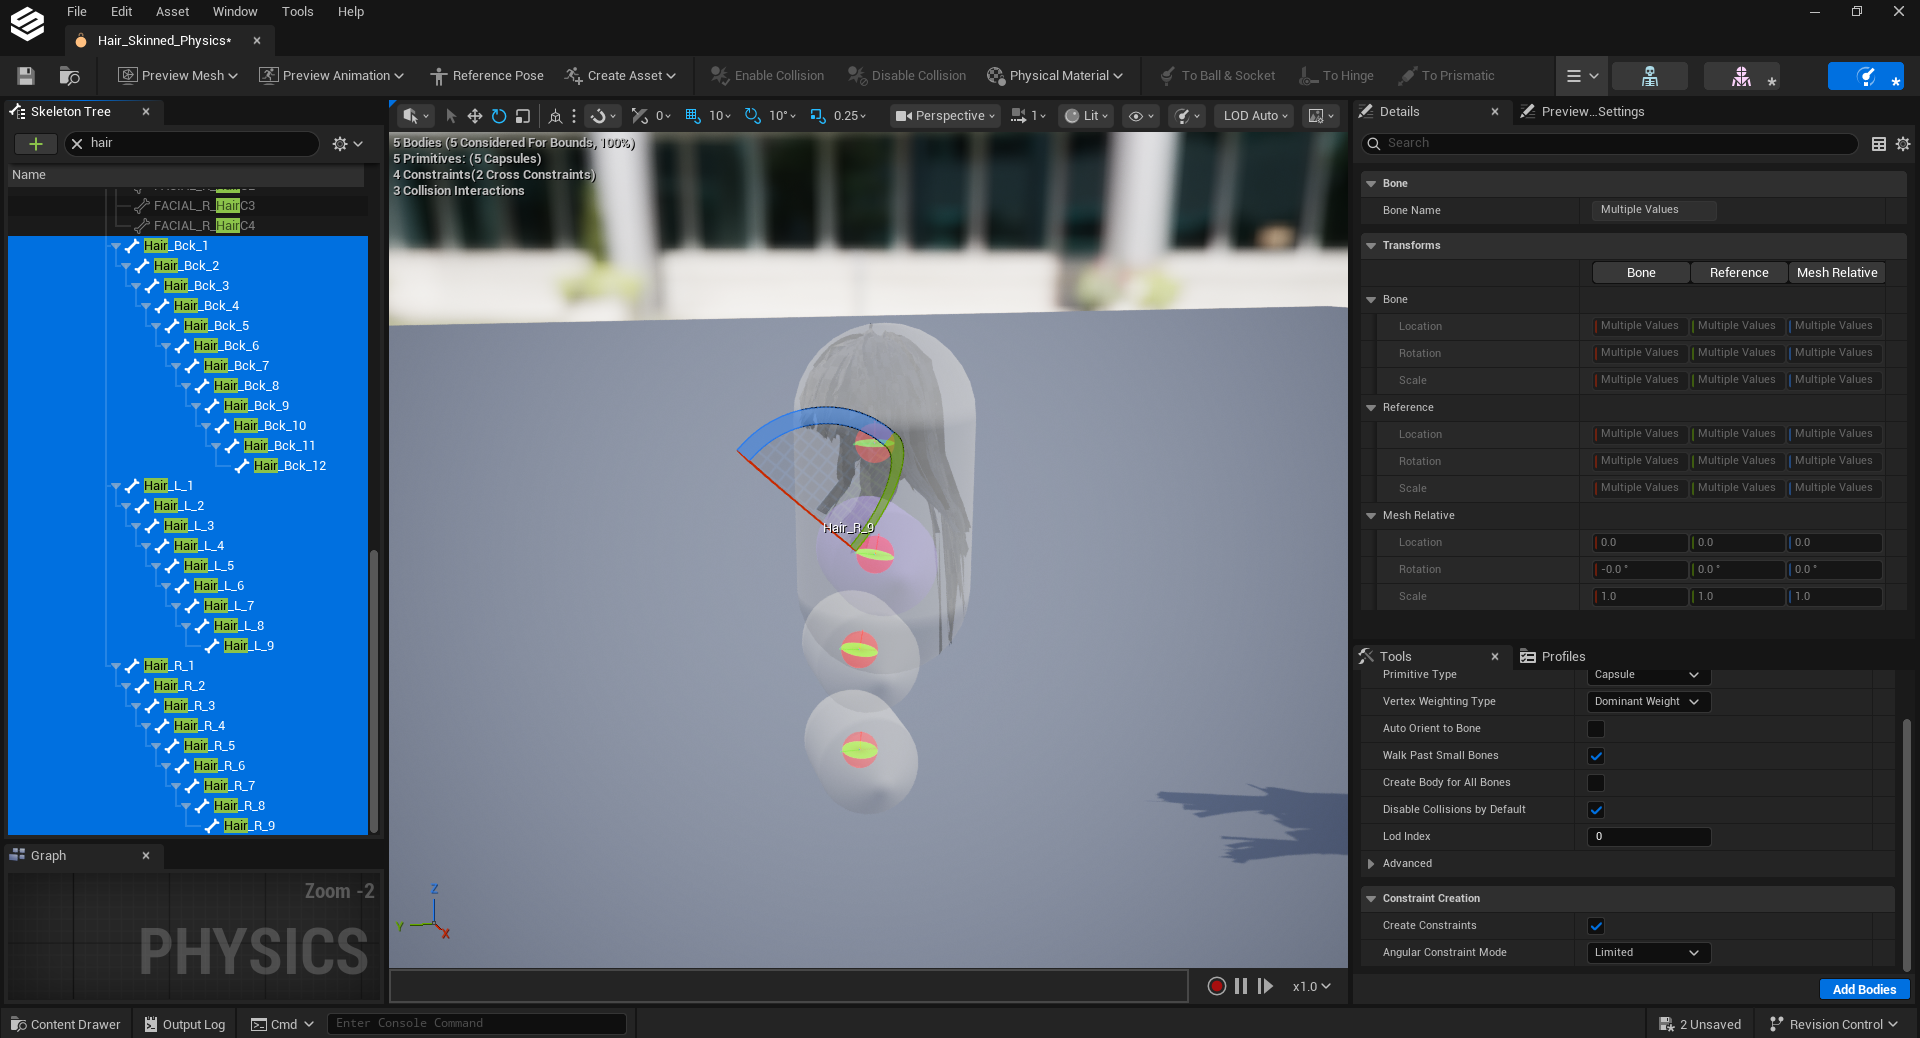
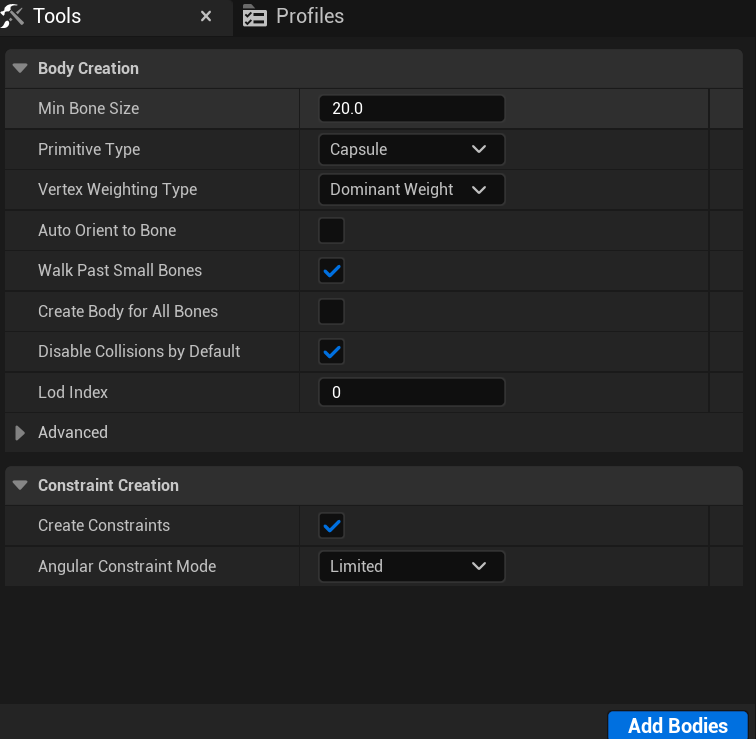
With all hair bones selected, press the Add Bodies button which is located in the Tools tab at the bottom right corner of the Physics Asset editor. It will look like this:
Make sure the Primitive type is still set to Capsule. (Just like all other windows, if you don’t see this tab, enable it in Window > Tools in the main editor toolbar at the top of the editor window).
Do the same for all chains of hair bones you have.
After that, hide bones again to keep the Skeleton Tree hierarchy clear.
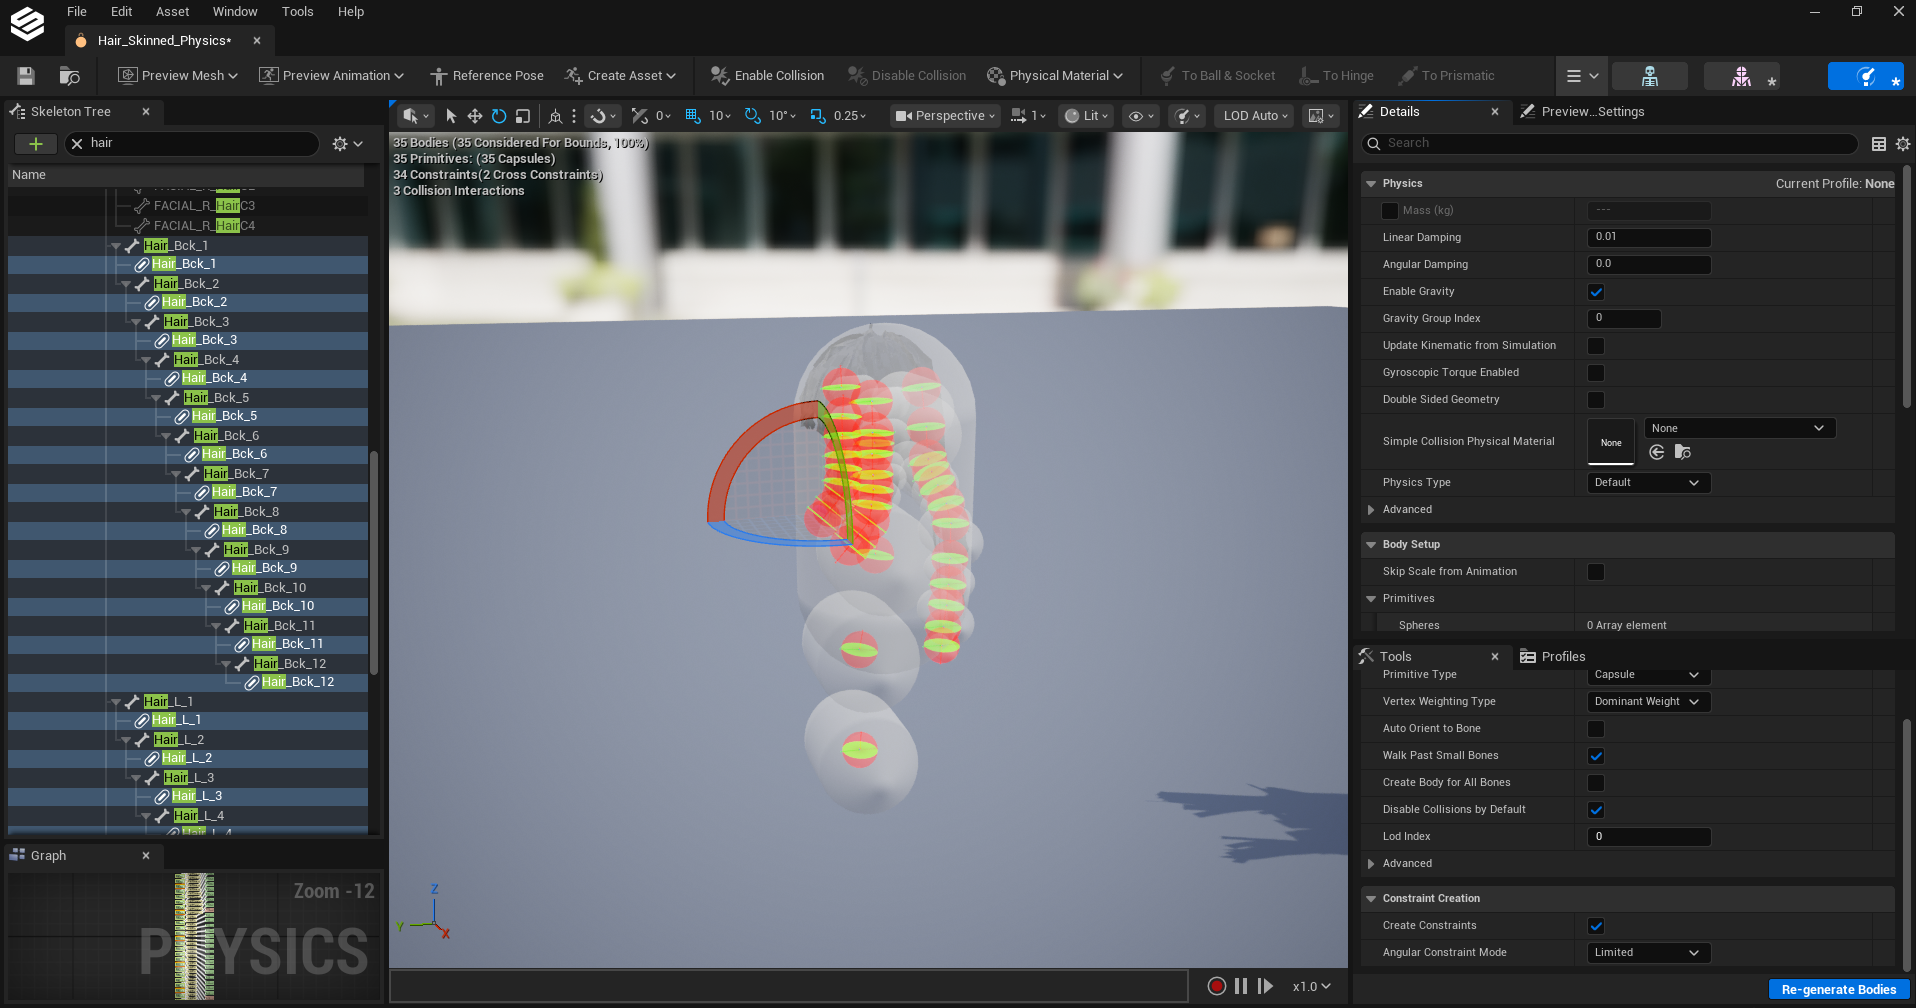
Then select all of the new Hair capsule bodies and change the Physics Type to Simulated. HELIX Studio may hang for a little while, this is normal.
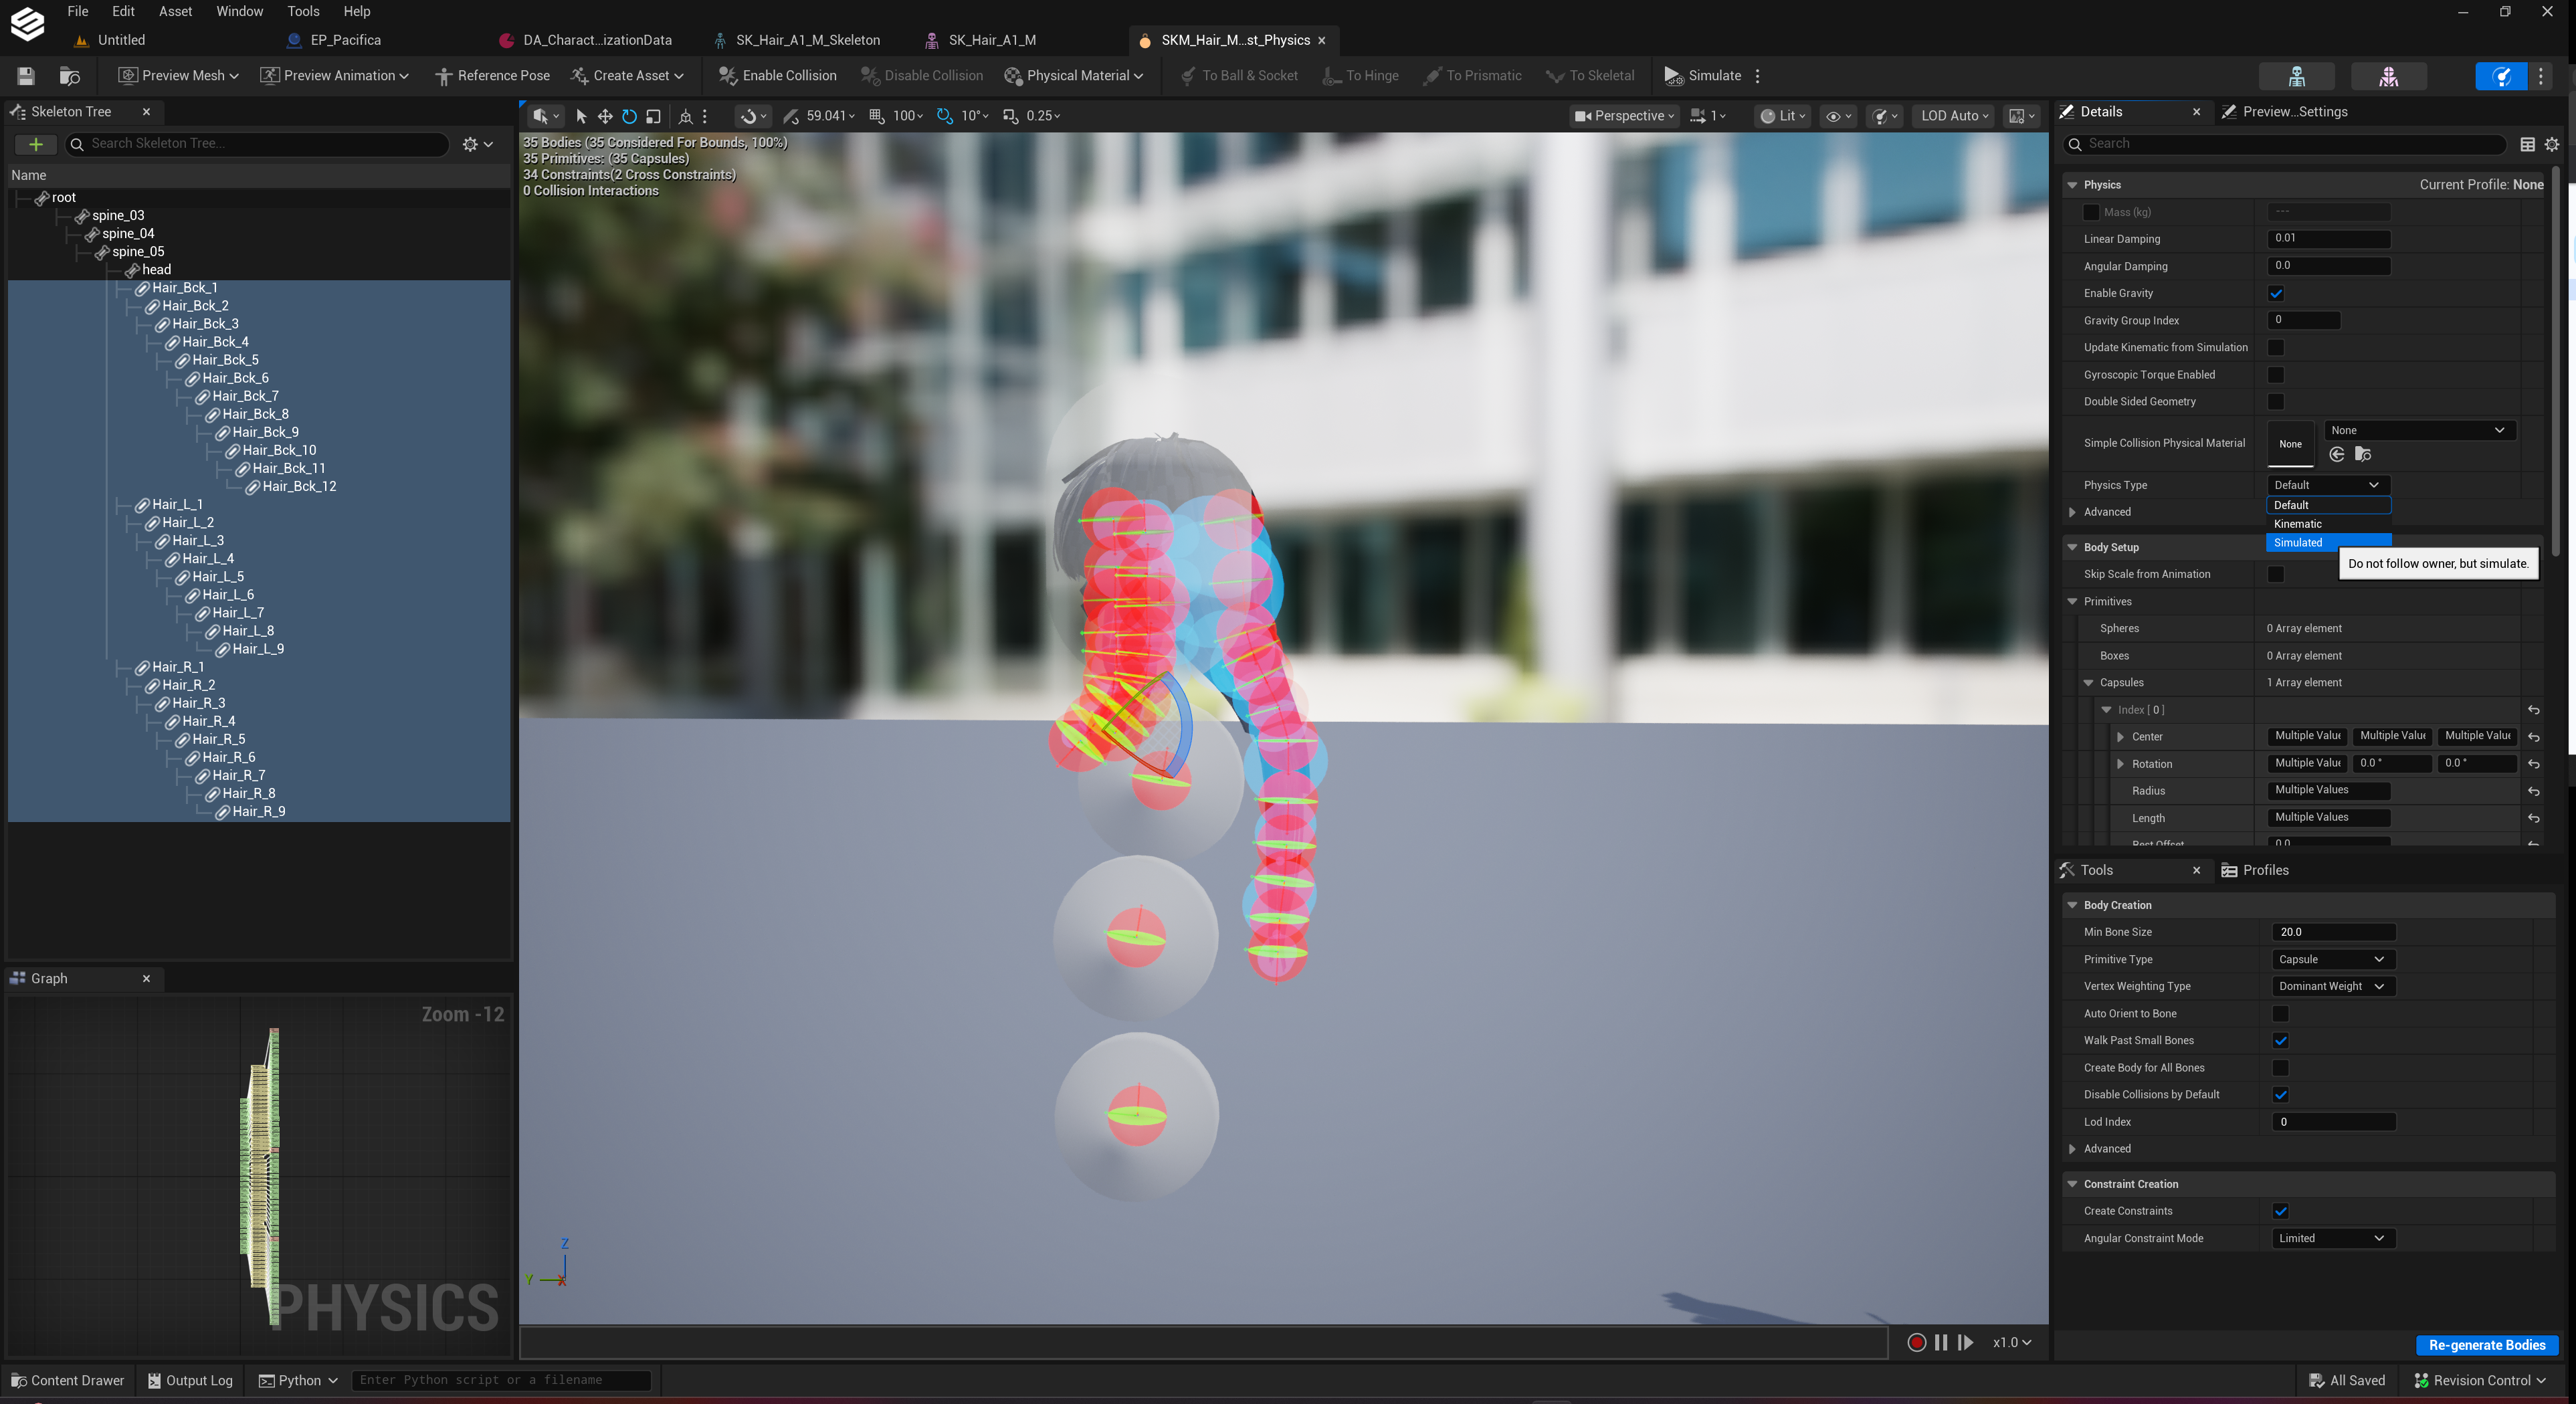
You can then hit Simulate again to see how the physics is interacting with your hair. This will help to inform you of appropriate changes you should make moving forwards (remember to stop simulating when you are done).
Now delete any excess capsules to get the best effect possible.
Convert Constraints#
The next step is to convert the constraints.
Select all hair constraint capsules, and drag select the constraints nodes in the physics graph.
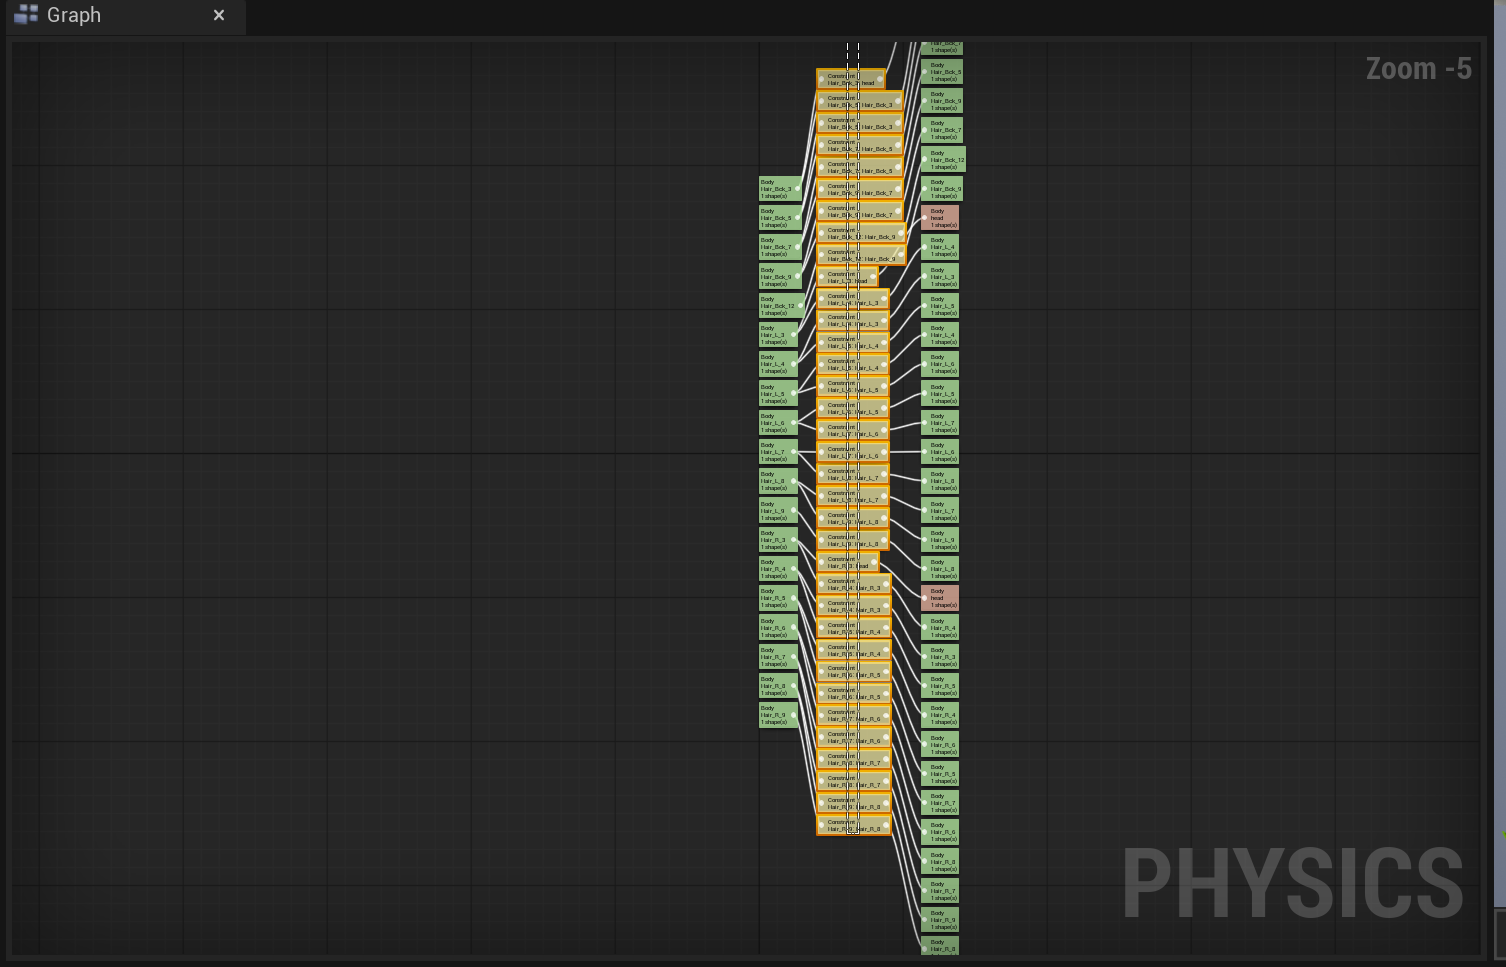
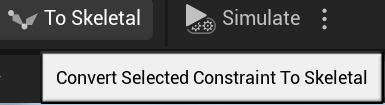
Select To Skeletal to convert the Constraints to Skeletal (This should change the red visualisations from spheres to cones)
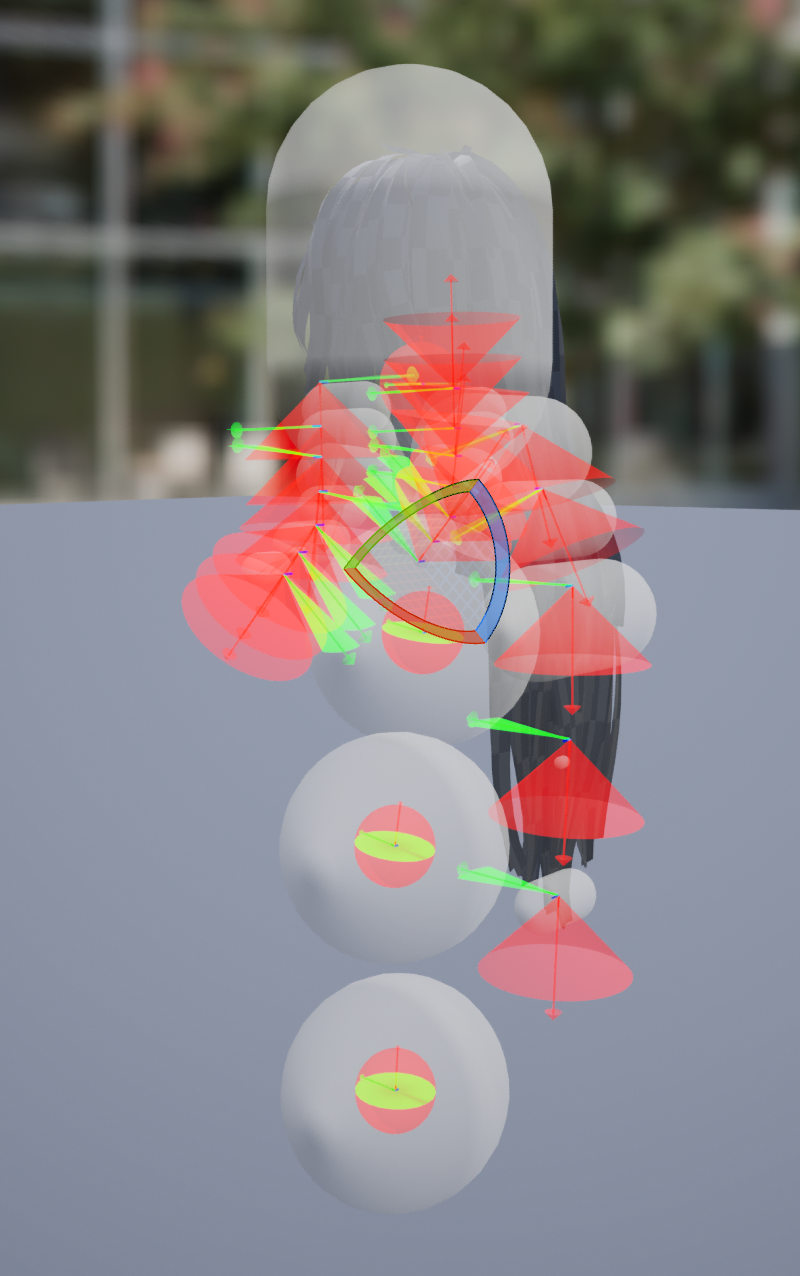
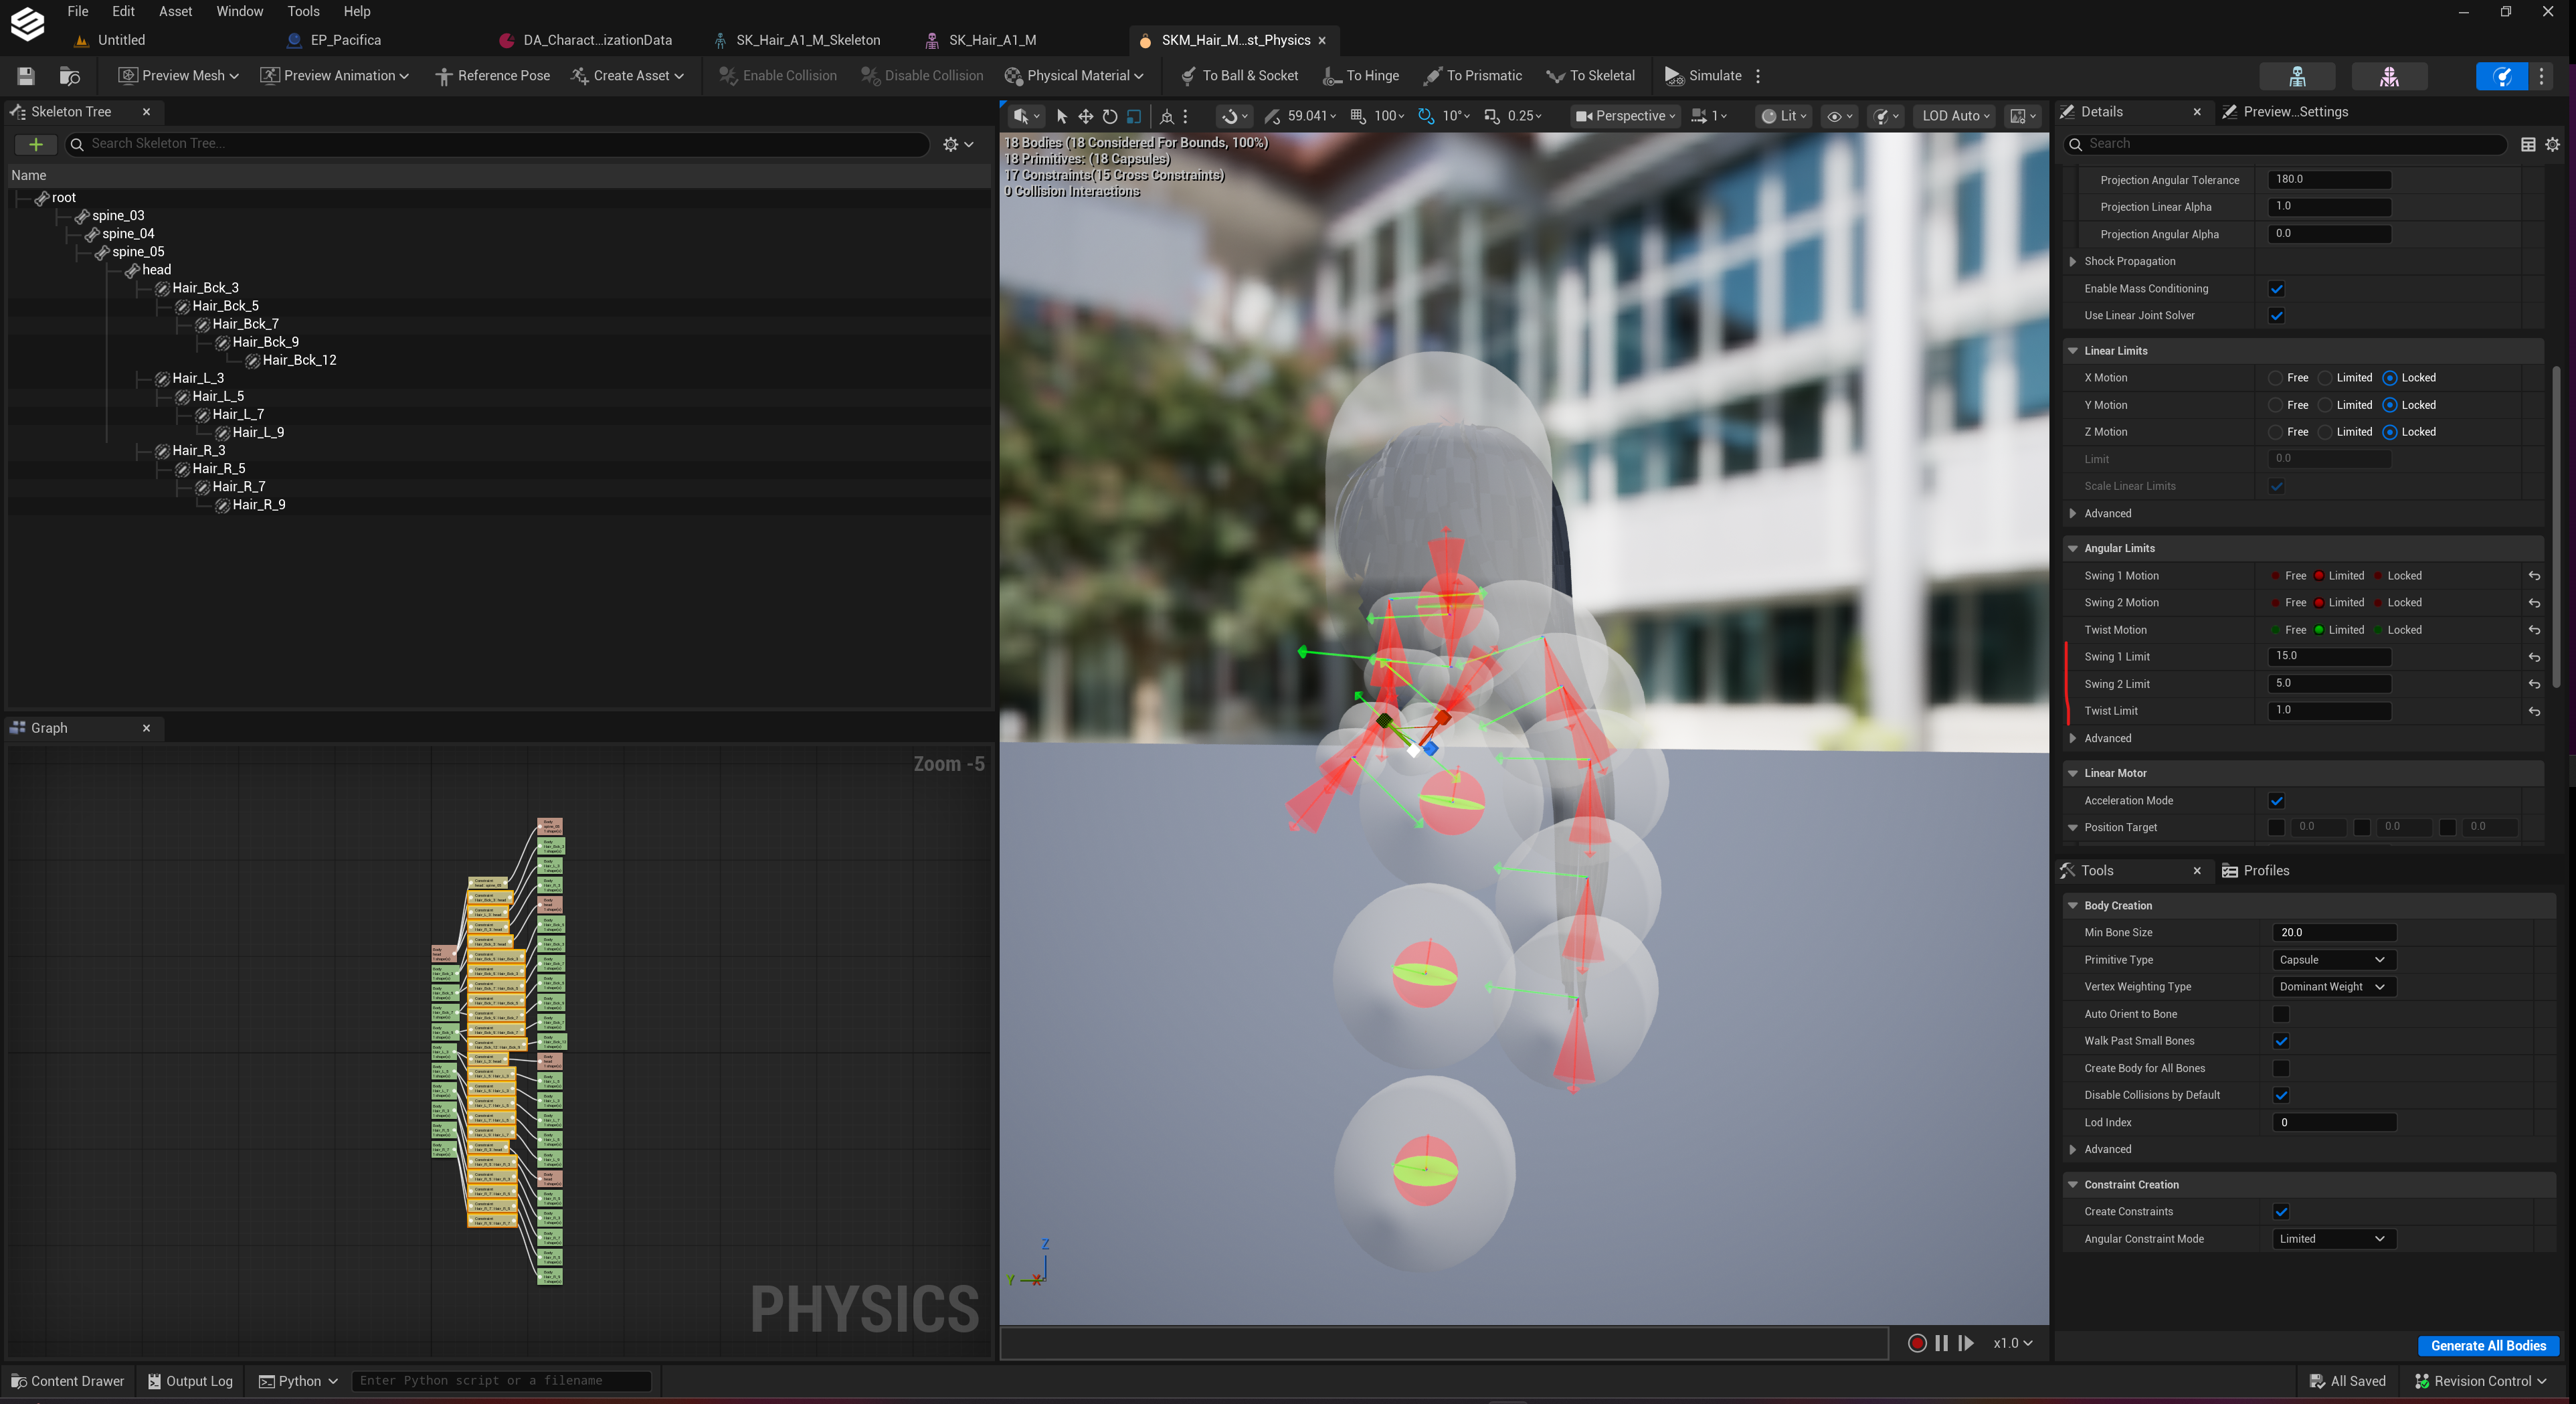
Then select all the hair constraints and change the Radius and Length to more appropriate values for your hair.
Tweak The Physics Setup Further#
You may choose to polish the physics setup of your dynamic hair further.
Adjusting the positioning of your hair constraints to control how it simulates / where the hair is pulled down.
Edit parameters in the Details menu such as Twist Limit within the Angular Limits section (it's required to select the constraint nodes in the Physics Graph for some of these settings before editing is enabled).
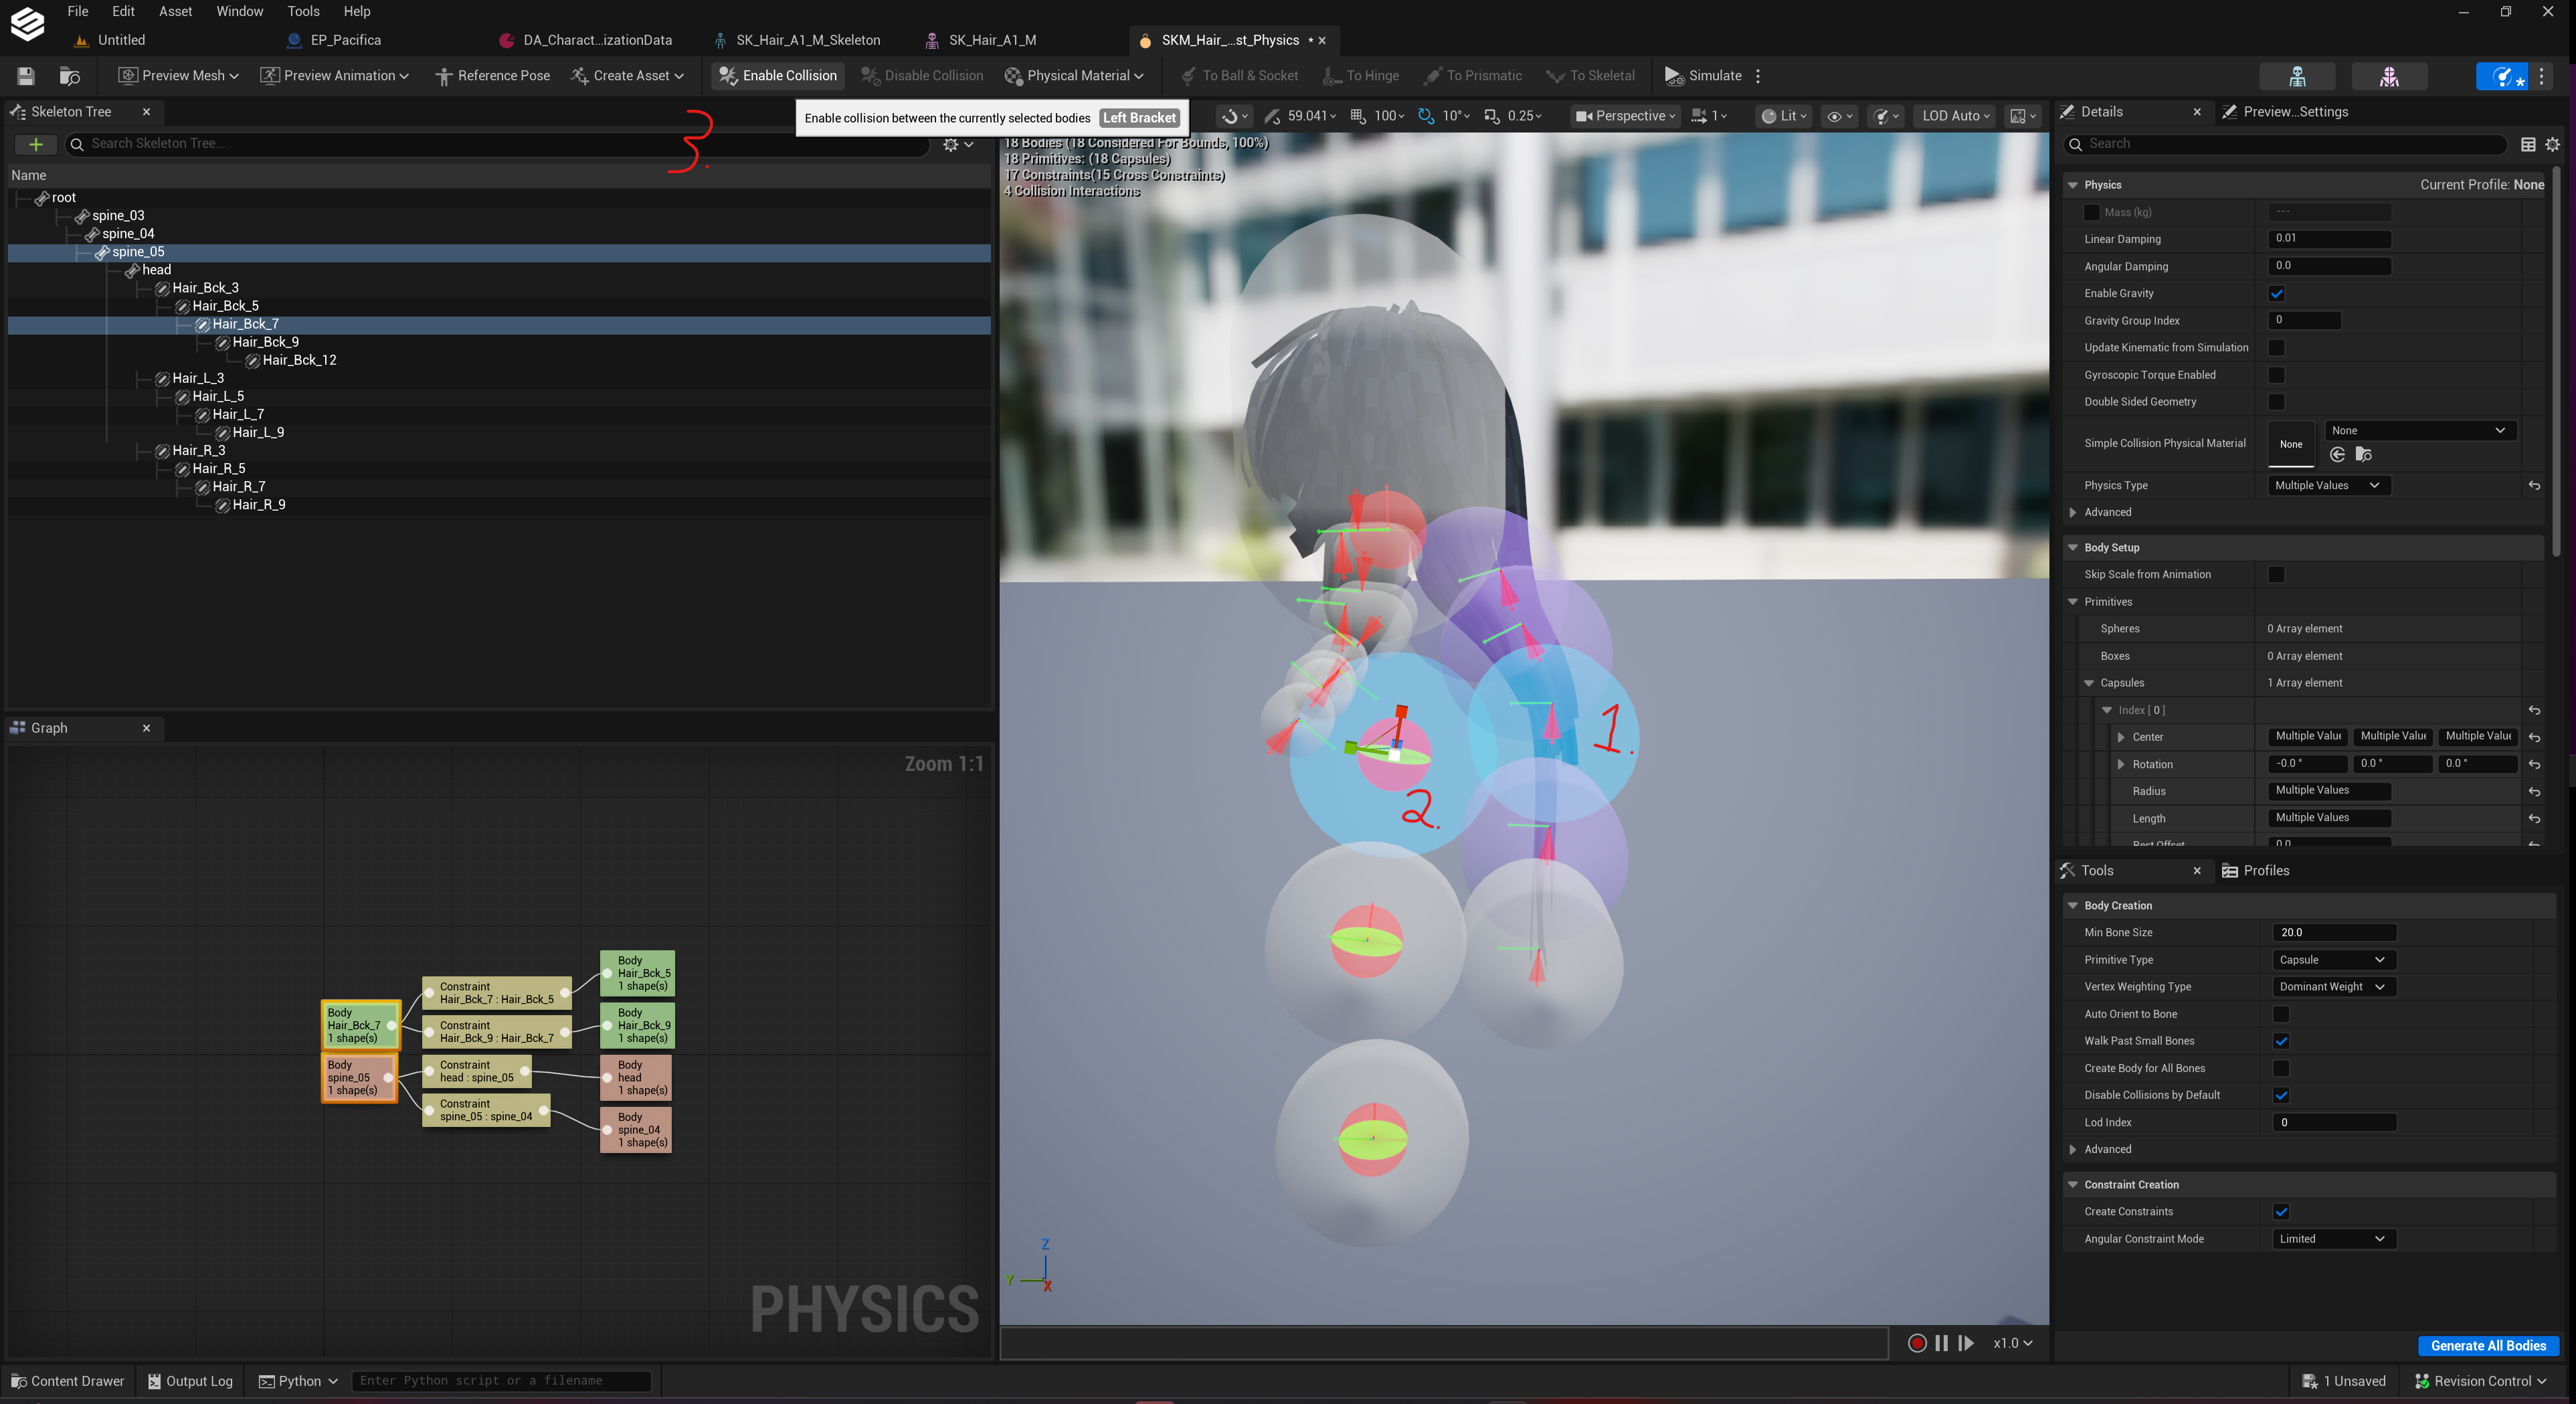
Enable Collision Interaction With Body#
Select a hair constraint and then shift select the body part capsule that you want the hair to collide with. Then press Enable Collision button in the toolbar.
5. Finalise Your Dynamic Hair Set Up#
Once the above is done, refer back to the Wearables tutorial starting from the LOD section (section 7) or Integrate Into HELIX Character Creator (section 8).